Modifying scanned files often requires converting static images into malleable text. This article covers six straightforward methods for applying edits once conversion unlocks customization – from built-in Mac tools to advanced OCR platforms.
1. How to Edit a Scanned Document with Signaturely: Easiest Method
Using Signaturely to edit a scanned signature or document is the easiest method. As an intuitive cloud-based platform built specifically for managing and modifying digital documents, Signaturely provides user-friendly tools for seamlessly editing scans to email. With no need for optical character recognition (OCR) technology or other complex software, Signaturely enables you to make changes to scanned files in just a few clicks.
The step-by-step process is straightforward:
- First, sign up for a Signaturely account or log into your existing one. The interface is clean and simple to navigate.
- Next, upload your scanned document by clicking the “Upload” button or dragging and dropping the file directly into Signaturely.
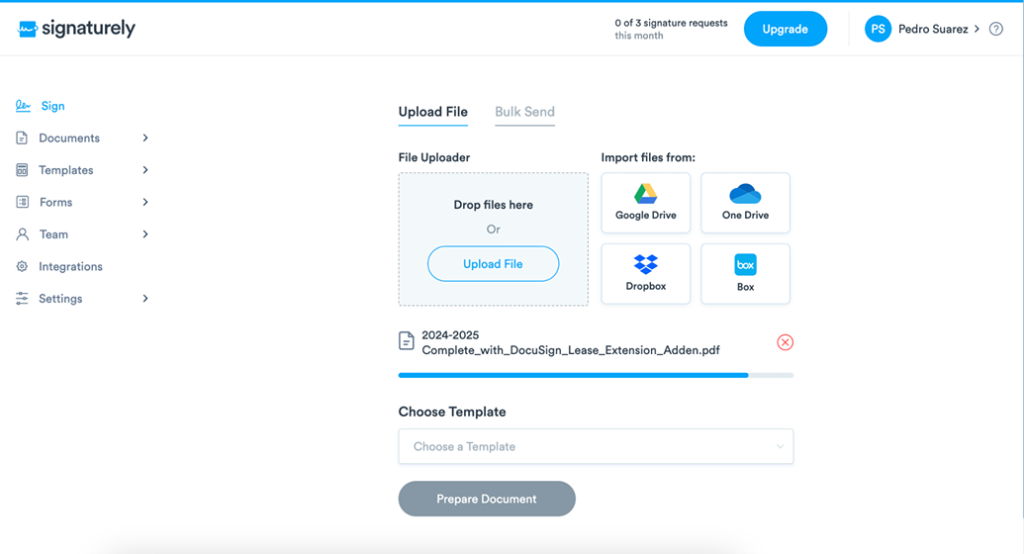
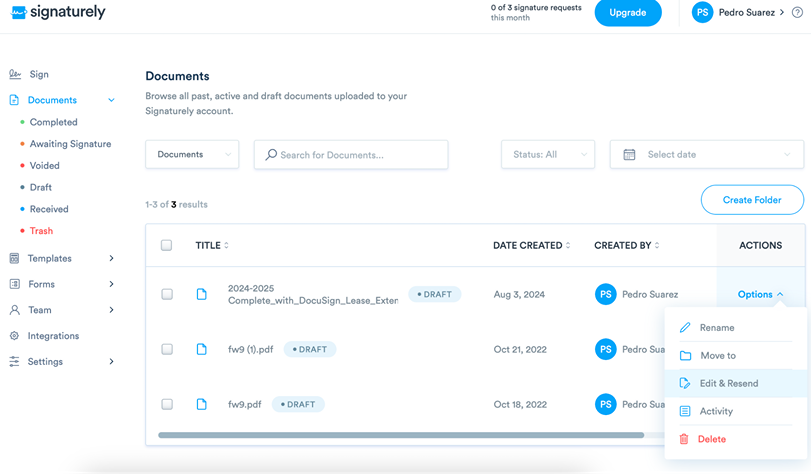
3. Once uploaded, select the document and click the “Edit & Resend” option to access Signaturely’s built-in editing tools.
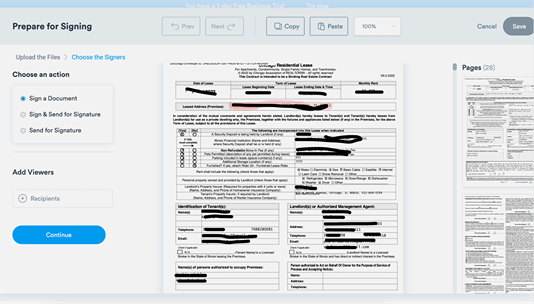
- Use the text editor to modify, add, or remove text. You can also tweak formatting like fonts and layouts. Signaturely automatically detects separate text blocks, allowing you to edit precisely.
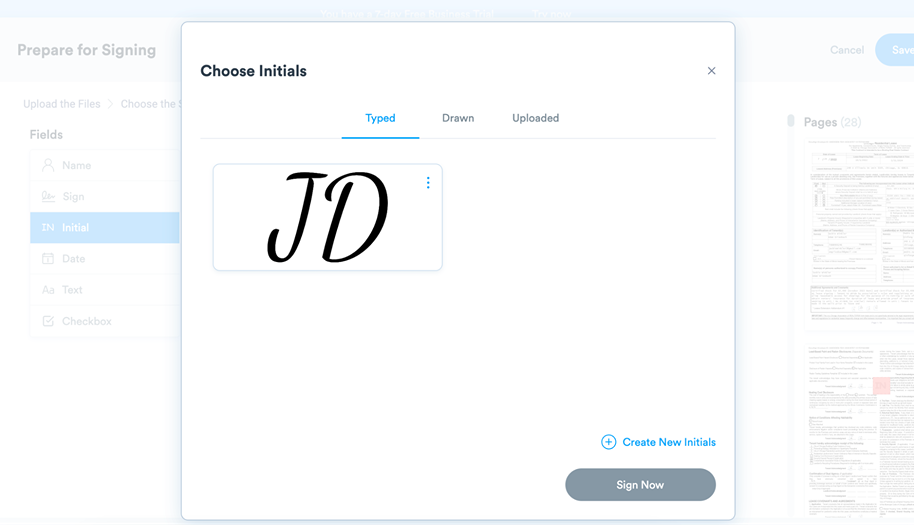
- Signaturely also enables easy electronic signing and initials. Simply drag the digital signature tool to the correct spot and fill in the recipient’s name.
- When you’re done editing, click “Save” to preserve all changes. If you need to send or email the finalized signed document to recipients, use Signaturely’s streamlined “Send” feature to share directly and securely from the platform.
Access the “Manage” section at any time to check document status, set reminders, and disable automatic notifications if no longer needed. With its user-friendly interface, built-in editing capabilities, and handy document management tools, Signaturely makes light work of editing scanned files. The collaborative features also empower teams to modify scans and digitized signatures efficiently.
2. How to Edit a Scanned Document in Preview: Best for Macs
For Mac users, editing a scanned document right within Preview is a seamless option. Preview is Apple’s built-in application for viewing and making basic edits to all kinds of files, including scanned PDFs and images. With no need to install additional software, the familiar Preview interface allows Mac users to modify scans quickly and easily.
- To get started, simply double-click your scanned document to open it in Preview or right-click and select “Open with Preview.”
- Click “View” then “Show Markup Toolbar” to reveal editing tools.
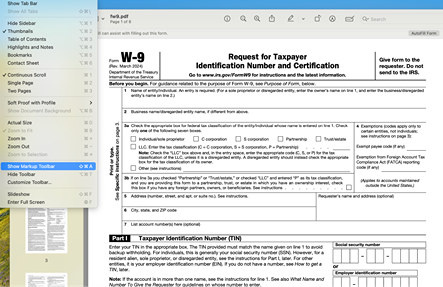
- You can add text boxes wherever needed, highlight or underline key passages, erase certain sections, draw shapes and arrows, crop/rotate pages, and adjust color/contrast.
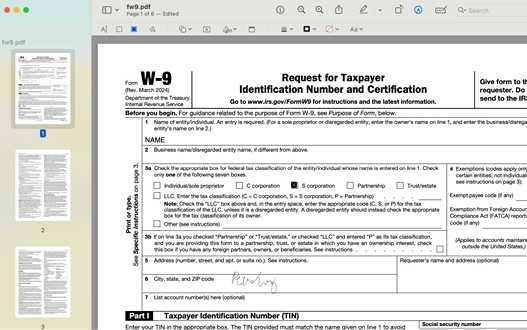
Preview makes it simple for Mac users to annotate and make minor edits to scanned files without learning a new program. With handy keyboard shortcuts, powerful search functions, and seamless iCloud syncing, Preview leverages all the native capabilities Mac users expect. No OCR or more advanced formatting options exist, but Apple’s built-in Preview app is hard to beat for basic everyday scan edits.
3. How to Edit a Scanned Document in Adobe Acrobat: Best for Windows
For Windows users, Adobe Acrobat is the top choice for editing scanned documents. As the industry standard for comprehensive PDF signing and modification on PCs, Acrobat leverages robust optical character recognition (OCR) technology to convert scans into fully editable files.
- To get started, launch Adobe Acrobat on your Windows machine and use the “Open” command to import your scanned document. Acrobat will automatically analyze the file and apply OCR as needed to make the text interactive.
- Use Acrobat’s efficient editing tools to tweak font, size, color, and other text formatting. Easily insert new content with the “Add Text” tool or delete any unwanted elements. Images can also be resized, repositioned, and adjusted within the PDF without printing.
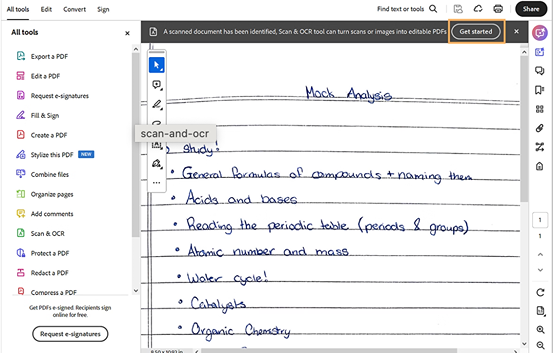
3. Additionally, pages from scanned documents can be reorganized via drag and drop, and the integrated “Compare Files” feature lets you review changes.
4. Finally, use the “Save As” command to give the edited scan a new name and export it to any desired location.
With its seamless Windows integration, constant updates, and interoperability with other Adobe apps, Acrobat is the scanned document editor of choice for most PC users. No other program matches its balance of OCR capabilities and advanced PDF editing tools.
4. How to Edit a Scanned Document in Word: Best for Simple Edits
For simple text-based edits, Microsoft Word provides a convenient way to modify scanned documents. Since Word is installed on most computers, users can avoid switching between multiple programs. It best suits straightforward formatting changes rather than major OCR and layout adjustments.
- To start, launch Word and select “Open” from the File menu.
- Browse to the scanned PDF you wish to edit and select it. Word will automatically convert the scan into an editable Word document. Minor conversion inaccuracies may occur.
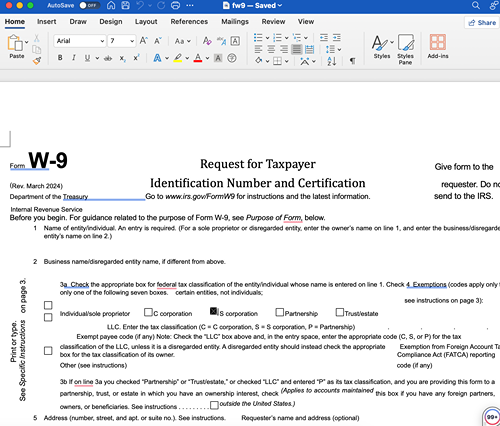
3. Once converted, you can click directly on the text to make modifications. Use Word’s familiar editing tools to tweak font, size, alignment, color, and other basic text properties.
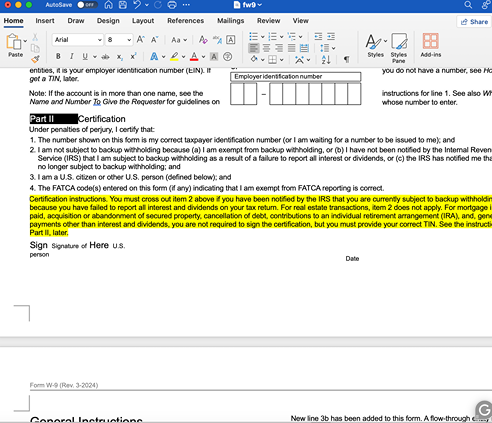
4. While specialized software like Adobe Acrobat is better suited for more complex scanned document editing, Word works well for minor text changes and annotations.
5. When done editing, choose “Save As” from the File menu, select a name and location for the edited version, and pick PDF as the file format if you want to save it as a PDF.
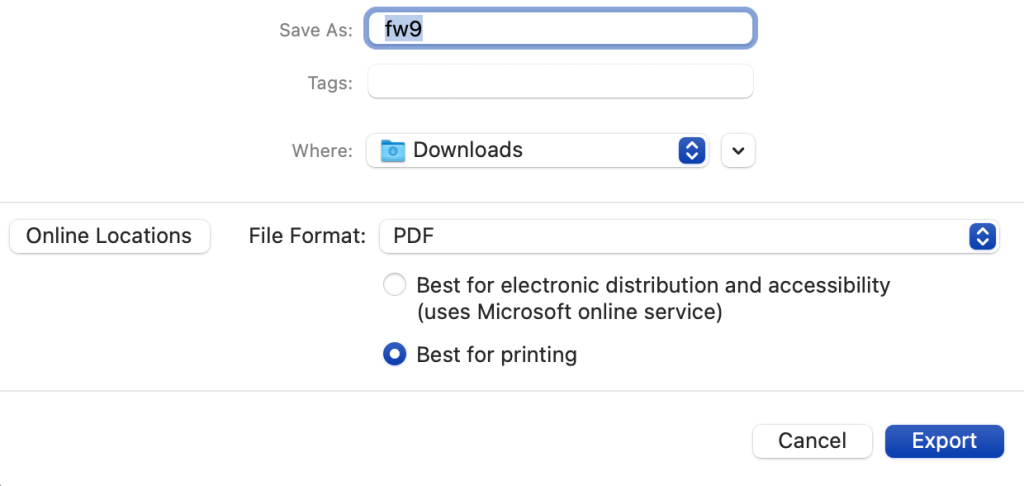
6. Then click “Save” or “Export” to finalize the changes.
Thanks to its widespread availability and status as a simple text editor, Microsoft Word is a convenient, integrated option for applying basic edits to scanned documents.
5. How to Edit a Scanned Document in Google Docs: Best for Online Edits
For those who prefer handling and signing documents online, Google Docs delivers capable scanned PDF editing without requiring additional software. As Google’s web-based word processor, Docs enables users with a Google account to leverage built-in optical character recognition (OCR) for converting scans into editable files.
Uploading a scanned document is simple:
- Go to Google Drive, select “New,” then “File upload,” and select the desired scan from your computer.
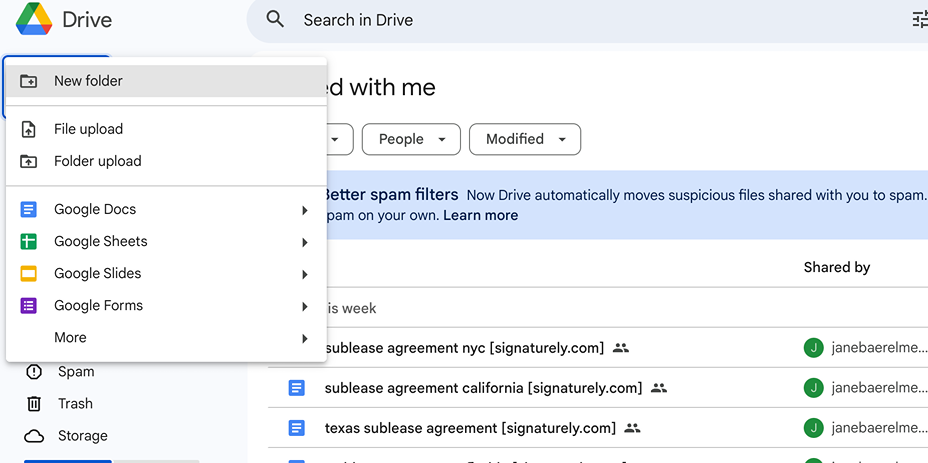
2. Once uploaded, right-click the file and use the “Open with” feature to launch and sign the document in Google Docs. The OCR technology will automatically make the text interactive.
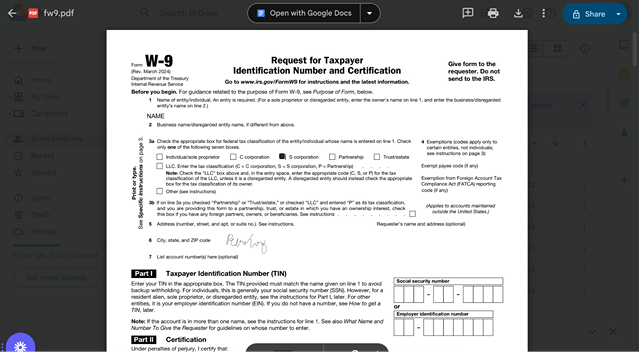
3. From there, you can edit content like any other Docs file, with the full formatting toolbar at your fingertips.
4. Insert or delete text as needed, modify font/size/color, add images and other elements, tweak the layout, and make any other changes. Because everything is cloud-based, Google Docs facilitates real-time collaboration on scanned documents.
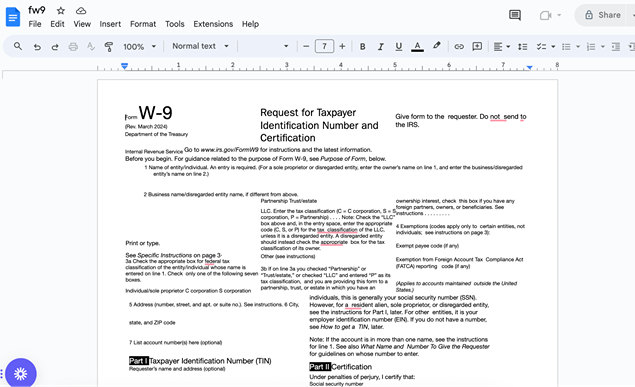
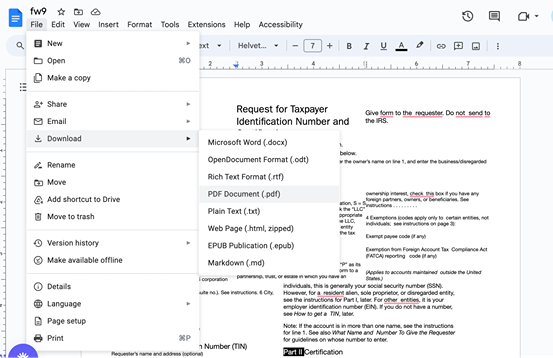
5. Finally, you can download the revised document in PDF, Word, or other formats by clicking “File” and then “Download.”
6. Store the edited scan wherever convenient. Thanks to its tight integration with Google Drive and built-in conversion capabilities, Google Docs lets you skip additional software and edit scans online.
6. How to Use Online Tools to Edit a Scanned Document
Online tools offer a quick, accessible scanning and editing solution without requiring software installation. Web-based options provide on-demand OCR conversion and modification capabilities for occasional users or those without regular access to advanced editors like Adobe Acrobat.
- Services like PDFgear, ScanWritr, and OnlineOCR allow easy uploading of scanned files through the browser.
- Simply navigate the website, choose “Upload,” or drag and drop your document. If necessary, The platform will run integrated optical character recognition or provide immediate editing options.
- Once converted, you can add text boxes, make annotations with highlighters or drawing tools, insert images, crop content, rearrange pages, and make various other adjustments right through the toolbar.
- When complete, download the revised scan in PDF, Word, or other formats by clicking “Save” or “Download.” Storage locations depend on the specific tool, but edited documents can be exported to local devices.
Online scanning/editing tools provide an easy alternative for quick edits without software installation hassles. While advanced functionality is limited compared to desktop applications, these free PDF signer web-based platforms serve basic modification needs for scanned documents.
What is the Best Way to Edit a Scanned PDF File?
Signaturely is, without a doubt, the optimal tool for editing scanned PDF documents. Its cloud-based platform offers built-in optical character recognition (OCR) to convert static scans into fully editable files instantly. With an intuitive interface accessible from any web browser, Signaturely makes it easy for anyone to revise scans without technical expertise or extensive training. Teams can even collaborate on edits in real time.
By preserving original formatting and enabling precise modifications, Signaturely gives users more control than conventional word processors. It also offers more security and affordability than traditional desktop PDF editors that require software installations. With handy annotation features, simplified sharing tools, and secure backend PDF and document storage, Signaturely simply checks all the boxes to manage the entire scanned PDF editing process efficiently. For a seamless solution customized for modifying scans, Signaturely cannot be beaten.
What You Need to Remember About How to Edit a Scanned Document
The key to editing scanned documents is first converting images into interactive text via optical character recognition. The methods outlined offer versatile options to meet unique user needs and constraints, whether leveraging built-in software tools, advanced desktop editors, or convenient browser-based platforms. The range of choices empowers anyone to modify scans smoothly.
FAQs About How to Edit Scanned Documents
Below are some of the most frequently asked questions about how to edit scanned documents.
Yes, scanned documents can be converted into editable formats using a process called optical character recognition (OCR). OCR technology analyzes scanned images and types of signatures and extracts the text to make it fully selectable and customizable.
Specialized OCR software like Adobe Acrobat and PDF Pro allow uploading a scan and running an automated text recognition process. This renders the static document editable for modifying, annotating, and reformatting.
Scanned files require OCR conversion first to make edits beyond basic annotations. After undergoing OCR, scans can be edited using PDF editors, word processors, or online document tools.
On its own, a raw scanned image contains static text and elements that cannot be directly edited. Optical character recognition must be applied first to extract the text and render it interactive.
Leveraging PDF editing tools with built-in form creation capabilities allows the addition of fillable fields to the scanned content. Converting the scan to editable text also allows the insertion of customizable fillable segments.
