In this article, we’ll show you how to sign a document in Google Docs using four different methods:
- Digital signature software
- Chrome extensions
- Drawing your signature
- Scanning and uploading your signature
We’ll go through each option step by step so you can easily add an online signature in Google Docs, regardless of which option you choose.
Let’s get started.
How to Sign a Document in Google Docs Without Any Hassle
Here are four methods you can use to sign a document in Google Docs:
1. Digital Signature Software – Signaturely
Signaturely is one of the easiest methods of eSigning Google Docs quickly and efficiently. All you need to do is to open a free Signaturely account and connect it to your Google Drive.
From there, you can add the signing fields to populate your documents digitally with signatures and send them to your signees.
Here’s how:
1. Start by creating your signature:
Signaturely’s online signature creator allows you to generate your online signature by drawing or typing it and using this signature to sign any online document.
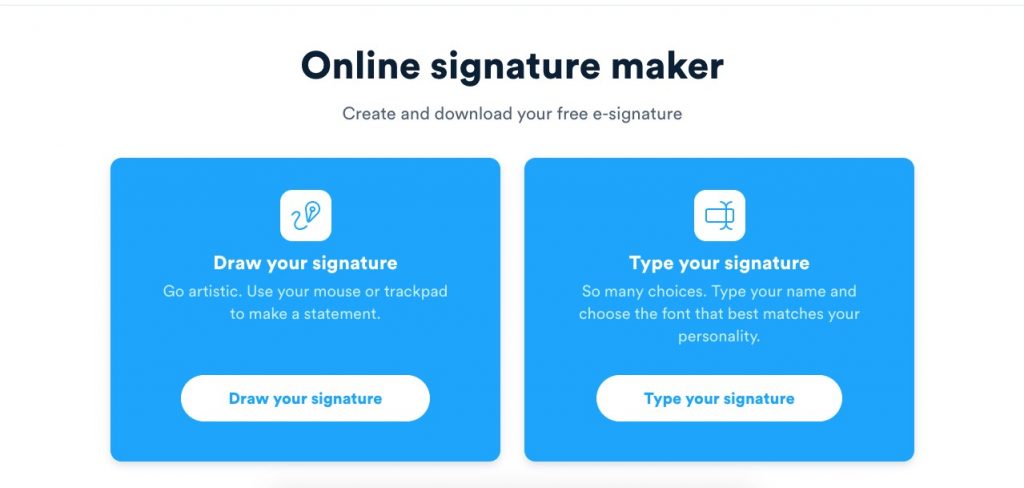
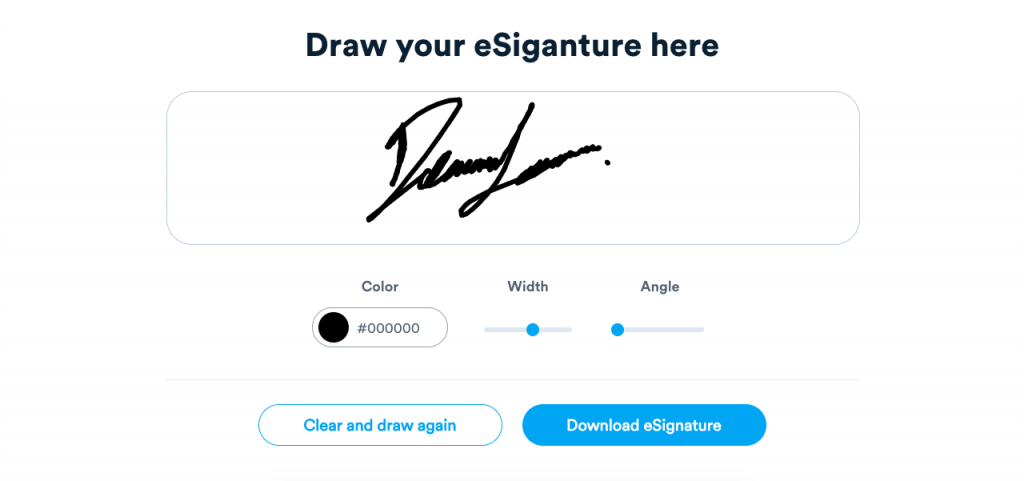
If you prefer to draw your signature, click “Draw your signature”. Then draw it using your mouse, trackpad, or stylus. You can clear it and start again until you’re happy with its appearance.
Finally, adjust the angle, color, and line thickness to make it completely unique.
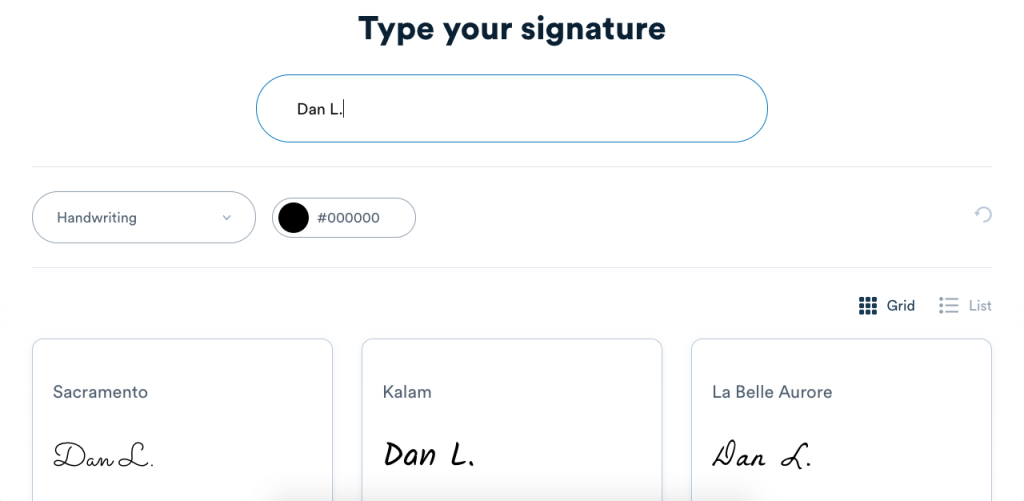
If you prefer to type your signature, click “Type your signature”. Type your name or initials in the box and choose one of 35+ fonts and your favorite color to complete your signature.
Once you’ve finished creating your online signature, you can save it to use for the next steps.
2. Choose your signers
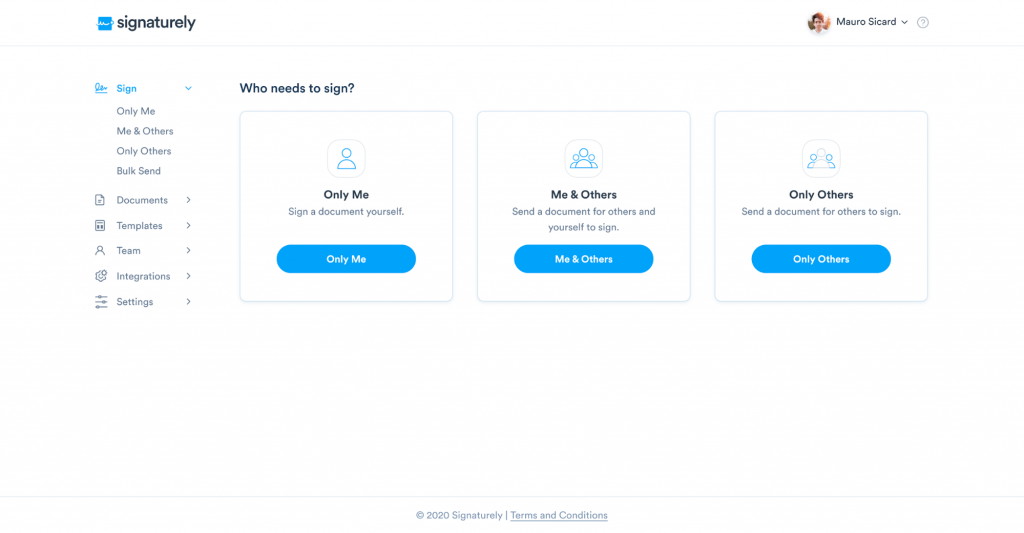
When uploading a document, Signaturely will first ask you to choose who will sign the contract. That way, Signaturely will then adapt its process depending on who will have to sign it.
In this step, you can also select the order the contract has to be signed in. Signaturely will automatically send the Google Doc from one signer to the next upon completing the previous signature.
If multiple people sign your document, choose “Me & Others”. If your contract only needs to be signed by you, choose “Only Me”.
2. Select and prepare your Google Doc
Now you’ll be able to upload your Google Doc to your Signaturely account.
Start by writing the title and the message your signees will receive. Then, under “Upload File”, select “Google Drive” to open your Google Drive account and select your Google Doc. Once the Google Doc is uploaded, fill in the signees’ email addresses and click on “Prepare Document”.

Here, you can select all the fields you’ll need for your documents, such as signatures, initials, dates, text boxes, or checkboxes. You can also assign individual fields to specific signers.
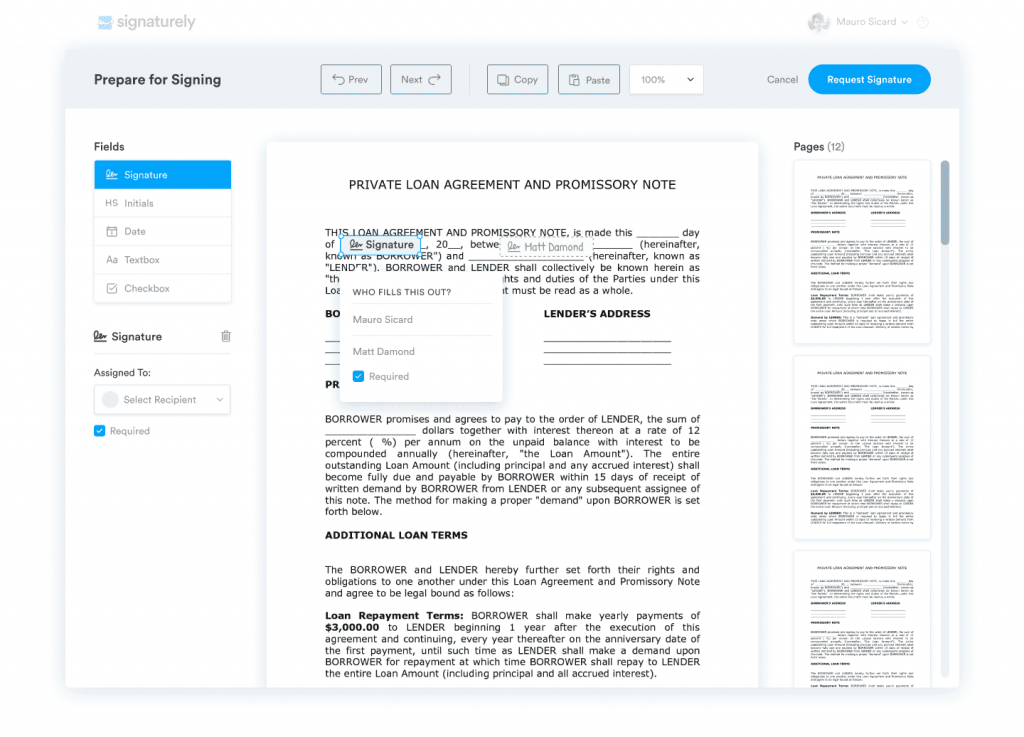
Once you’re done adding the fields, you can save a copy of the document and go to your document overview section.
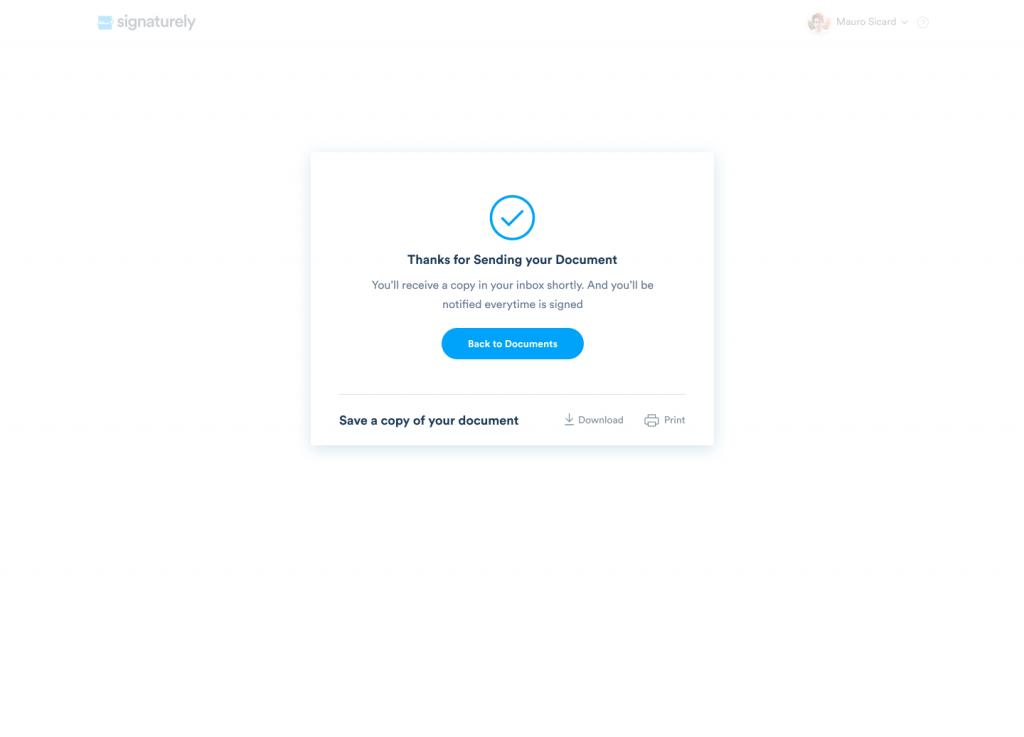
4. Send out your Google Doc
Once you’ve reviewed and sent your Google Doc through Signaturely, your signees will receive a signature request via email that looks something like this:

After clicking on “Review & Sign”, Signaturely will guide your signees through creating their own signature and using it to sign the contract, step by step.
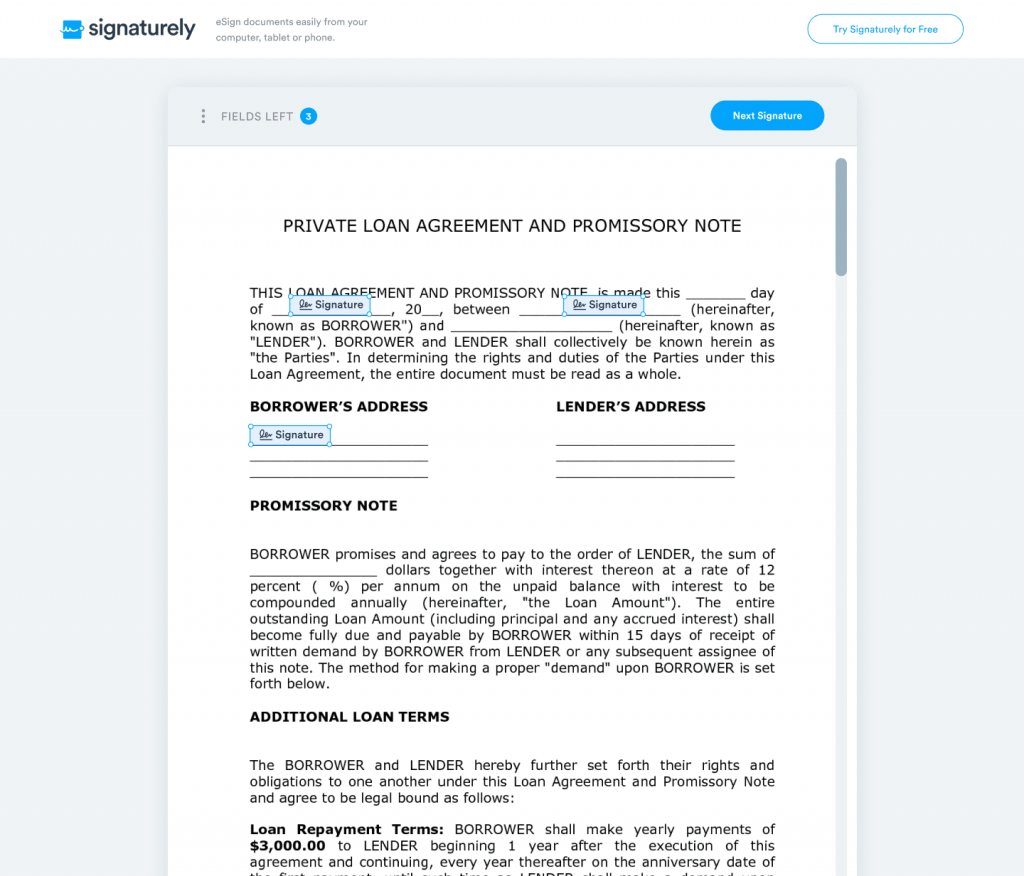
Once all parties sign the document, Signaturely saves the critical data and keeps a legal backup for all your documents, in case you need them in the future.

That’s how easy it is to have a Google Doc signed by you and anyone else in just a few minutes.
If you need help creating more documents, Signaturely gives you 45+ ready-made professional templates to copy and edit on Google Docs or directly in Signaturely’s editor.
Pros:
- Simple: All you need to do is to open your Google Doc in Signaturely, add the signature fields, and start signing.
- Safe: Since Signaturely saves the authentication data of all signees, like location, IP address, and time of signing, and since it locks the document during sending, the document is impossible to counterfeit or modify and is legally supported.
- Convenient: Signaturely offers access to your document’s audit log and history, making it impossible to lose or destroy and legally binding.
- Generous free plan: Unlike many other digital signature options, Signaturely gives you a free account with up to 3 signatures per month.
Cons:
- No mobile app available: The app is currently in development.
2. How to sign a document in Google Docs with Chrome extensions
Another way to digitally sign your Google Docs is through a Google Chrome extension.
Here’s how:
1. Open the Add-on Menu

Open your Google Document, go to Add-ons, and select Get add-on. Once you do, a small window will pop up on top of the document. This window provides options for installing new add-ons for your Google Docs.
2. Install an Add-on
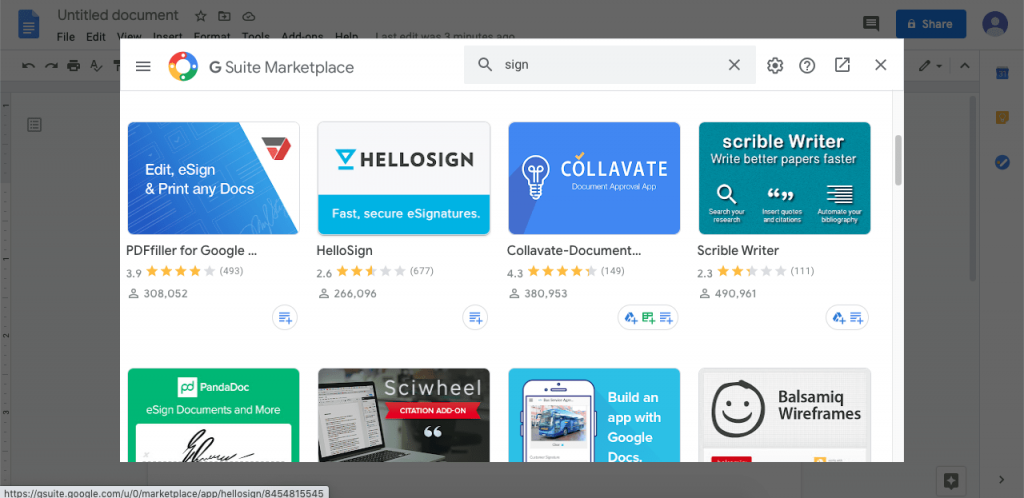
Using the search box in the add-on menu, look up “sign.” You be able to view multiple add-ons that can be used for eSigning documents online—directly in Google Docs. Most of these add-ons are free.
Once you select one, install it on your Google Drive.
Two of the options are DocuSign and HelloSign. You can also find a few more alternatives if you continue to scroll. Be sure to check each option’s ratings and features.
3. Open your new add-on

Once you’ve installed a new add-on, you can see it in the Add-ons menu. From there, the add-on will usually ask you to draw or upload your signature.
4. Add signature fields in your document.
Once you’ve uploaded your signature, the add-on will allow you to add Google Docs signature fields. Find the places in your document that require a signature, typically at the end of the document and the sides of each page, and add your signature fields.
5. Insert signature in Google Docs
After you’ve added the signature fields, click on each field to add your signature.
Once you’re done, you can send the link by clicking “Share”, or exit the file. The changes will be saved automatically.
Pros:
- Simple: You can add signatures without ever having to leave Google Docs.
- Intuitive: The add-on will direct you on how to use it, usually by clicking the place you want to sign and adding a signature field.
Cons:
- Buggy: Developers don’t spend much time developing these signature add-ons because so few people use them. This often results in add-ons containing bugs or other issues.
- Cumbersome start: Most signature platforms will require you to create an account on their website before you can use the add-on.
- Expensive: Most add-ons are created as a “freemium” version, which means you will need to pay to unlock multiple document signatures or other advanced options.
3. How to sign a document in Google Docs, drawing your signature
Here’s how to create an eSignature in Google Docs by drawing:
1. Open your Google Document
Open the document you want to sign in your Drive account and find your ideal signature space.
2. Insert a drawing
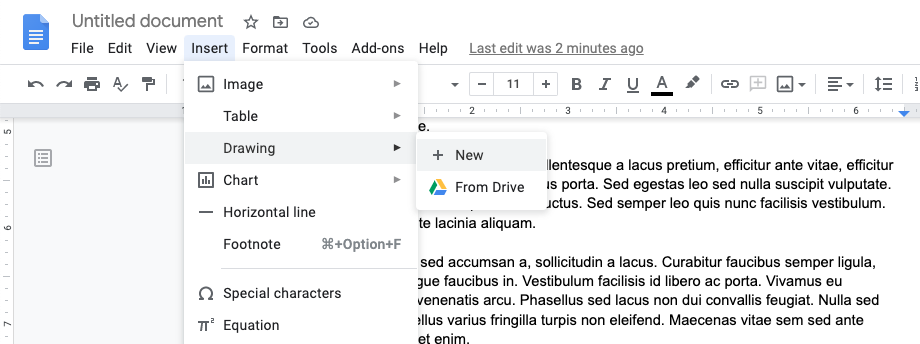
Once you’ve located the spot where your signature will be located, click on “Insert” on the menu bar, then choose “Drawing”. If you haven’t drawn your signature yet, select “New”.
3. Draw your signature

A small window will appear over your document. This window will be your canvas. To start drawing, open the menu next to the line and select “Scribble”. This option will allow you to use your mouse, trackpad, or touchscreen to draw freehand on the canvas.
Make as many attempts as necessary until you’re satisfied with your signature. Remember to use Control+Z to undo your last step if you need to.
4. Edit your signature
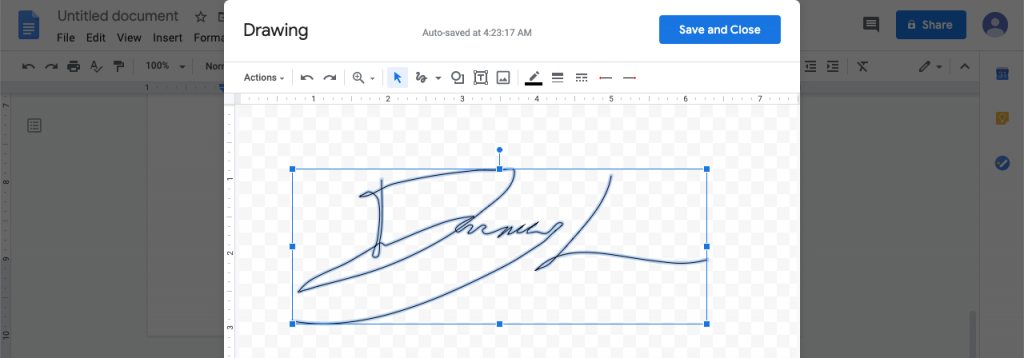
After you’ve created the signature, select your drawing to change the line’s thickness or color to customize it further. Selecting a thicker line will make the signature look more natural on the document. Here are some cool Signature ideas you can use as inspiration.
5. Save your signature

Once you’re done editing your signature, click “Save and Close” at the top right-hand corner of the window to use it in your document.
6. Fit it into the document
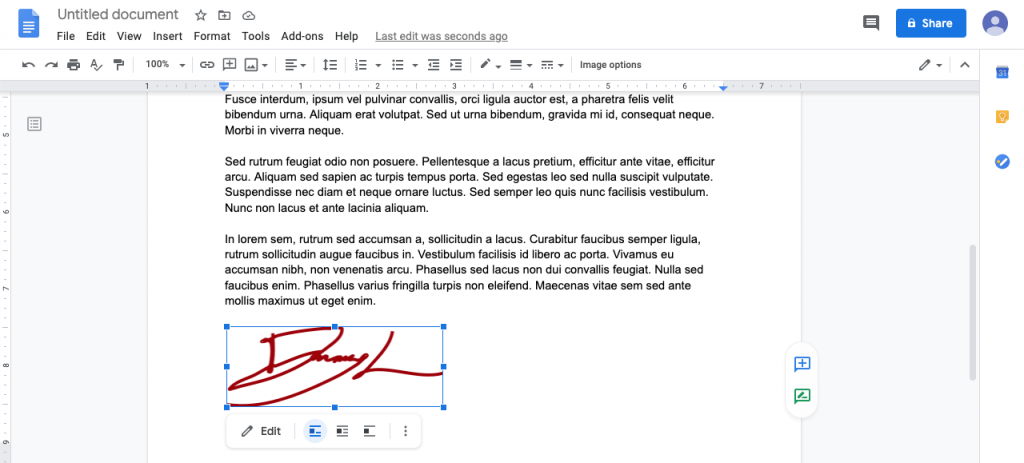
When you close the canvas, your signature will appear as an image in your document. The image may be too big, so resize it and place it where necessary.
7. Send and exit
Once you have the signature in its place, you can click on “Share”. This will give you a link to share the document with others. When you’re done with the document, exit the file. The changes will be saved automatically.
Pros:
- Simple: All you need to start is right in your Google Docs.
- Quick: You can sign your document immediately.
Cons:
- No legal backing: Your signature is just a drawing without any authentication, and the document can easily be modified before and after the signature is drawn.
4. How to sign a document on Google Docs by scanning and uploading your signature
Finally, you can print the document to sign and digitize it physically.
Here’s how:
1. Open the “Print” option
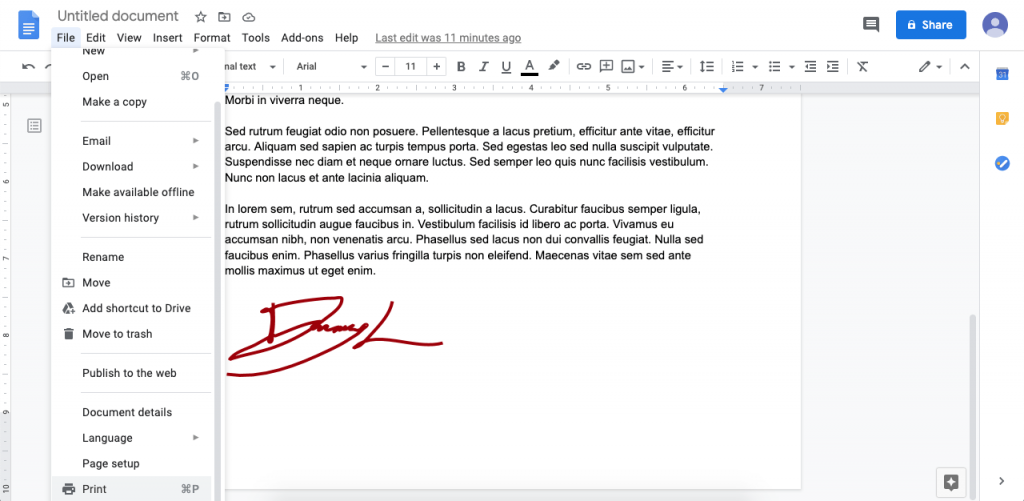
Open the Google Doc you want to sign. Then, go to “File” and scroll all the way down to click on the “Print” option.
You can also access the same option by pressing Ctrl+P in Windows or Command+P in iOs.
2. Print your document
Once you’ve selected “Print”, a window will pop up. Review your file, select the printer you want to use, and click “Print”.
This will start the printing process.
3. Sign your document
When the printing has finished, use a pen to sign each part of the document (usually the margins of every sheet) and add your signature at the end.
If you make a mistake while signing any of the pages, you can print that individual page again to replace it.
4. Scan your document with a scanner
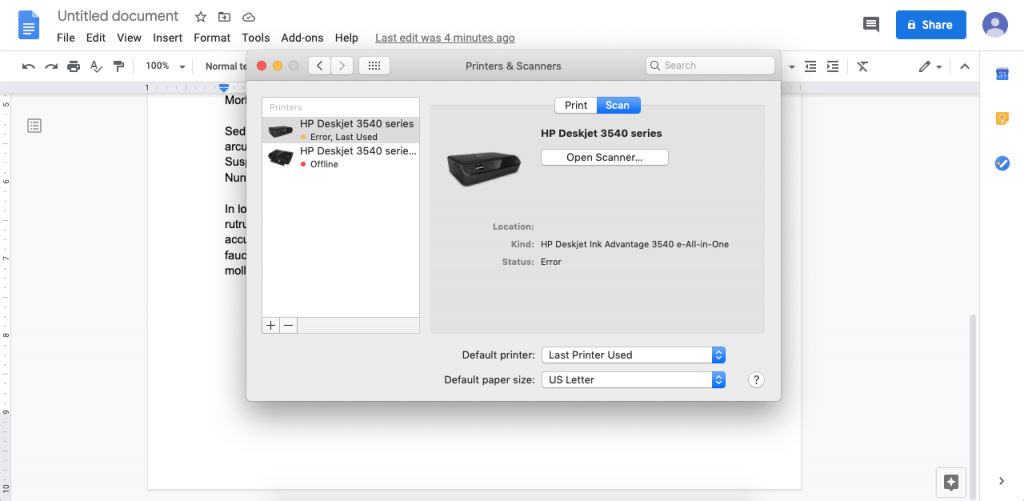
There are multiple ways to scan your document once it’s signed. If you have a scanner, you can connect it via Bluetooth or USB to your computer and look it up in your Control Panel in Windows, or in the System Preferences in iOs.
As long as the scanner is properly connected, you can simply follow the instructions to scan page by page and save each page as a PDF or JPEG—the two most used format files for documents.
5. Scan your document with your phone
You can use your phone to scan your document if you don’t have a scanner. You can choose from multiple scanner apps in the app store or use your phone’s camera app, provided you have good enough lighting.
To achieve a perfect finish, open the photo using a digital editing tool like Photoshop or Photopea. From there, you can boost the quality of the colors to make it look more solid, convert the photo into a black-and-white image to remove any glare or lighting inconsistencies and save it as a PDF or JPEG when you’re done.
You can also use a signature scanner and upload the signature to the document without printing it first.
6. Send your document
Once your document has been digitized and is ready to go, you can send it as an email attachment to your co-signers.
Pros:
- Low-tech: Anyone with a printer and a phone can easily sign the document wherever they’d like and send the final result to whoever needs it.
- Uses your ink signature: Since you need to sign it physically, you’ll get to use your ink signature, which is still required in some countries
Cons:
- Time-consuming: It takes a lot of time to print, scan, and edit the document to make it look perfect.
- No third-party support: Unlike using a digital signature, you won’t receive third-party legal support.
- Easy to counterfeit: Since it requires scanning and editing, the document won’t be saved with authentication options to show who signed it or when.
- Requires many tools: You’ll need a printer, paper, a scanner, and possibly a phone with a camera and digital graphics tools to get it done.
How to sign a document in Google Docs: Conclusion
Digital signing is used now more than ever. Since many people use Google Docs as their preferred word processor, knowing how to sign them is crucial.
Start signing your Google Docs with Signaturely to make your eSignature process quick, easy, and legally binding.
