

Security is one of the biggest concerns in our modern digital world: how safe are your digital assets? Companies must ensure their data is secure and protected from cyberattacks and data breaches.
This article will cover how to send documents securely via email. We’ve outlined four strategies you can use. These include:
- Password protection
- Electronic signature software
- Email encryption
- Email attachment encryption
Ready? Let’s dive in.
Method 1: Password Protect Your Files Before Attaching Them
One of the simplest ways to ensure the safety of your documents is to password-protect them. To do this, you assign a unique password to a single digital file or multiple files. The file or files cannot be read, edited, or deleted without the password.
When sending documents via email, using a password to protect your files is a great strategy to ensure they’re secure.
How to password protect your files
There’s no simple, universal way to password-protect your files. Different file types will have their unique step-by-step processes. The operating system you use can also influence this.
Below, we’ll outline how to password-protect every file type and operating system:
PDF file
The password protection process for a PDF file varies, depending on your operating system. You’ll find the specific how-to details for both Windows and Mac below:
Windows
There are three ways you can password-protect a PDF file on the Windows operating system:
- Use Microsoft Office to create a new password-protected PDF
- Use Adobe Acrobat to password protect an existing PDF
- Use a free tool like PDFEncrypt or PDF24 Creator
Microsoft Office
If you can access Microsoft Office applications such as PowerPoint, Word, or Excel, you can save documents as PDFs. You can also password-protect files easily.
To turn any document into a password-protected PDF with a Microsoft Office application, follow these instructions:
- Open the file in an appropriate Microsoft Office application.
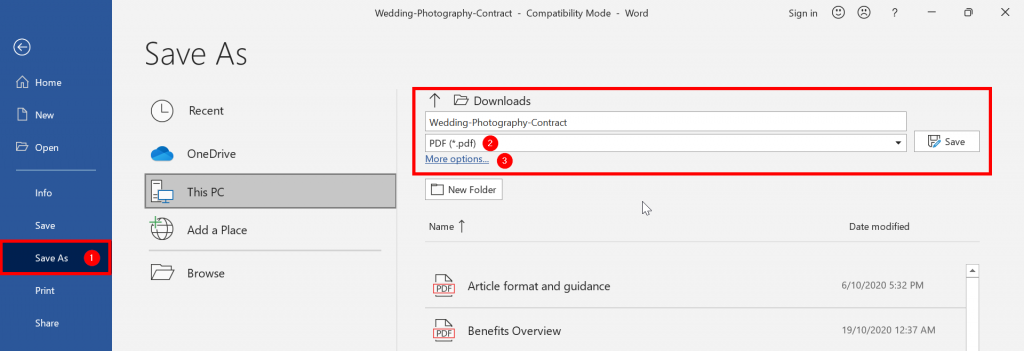
- Select “File.”
- Select “Save As.”
- Change the file type to “PDF.”
- Select “More options…”
- Select “Options…”
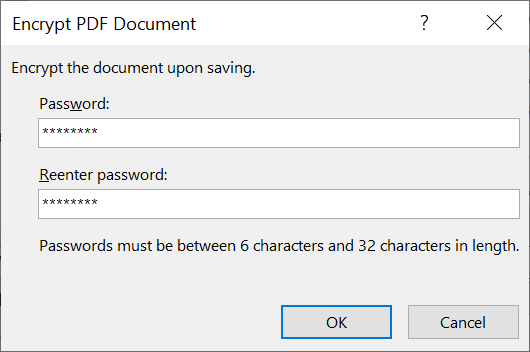
- Select “Encrypt the document with a password.”
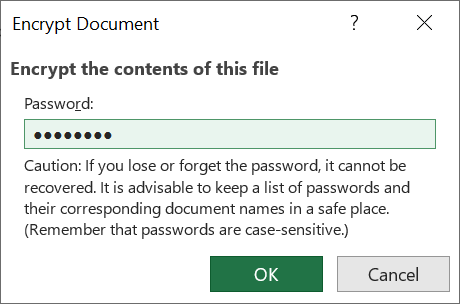
- Enter your password and confirm it.

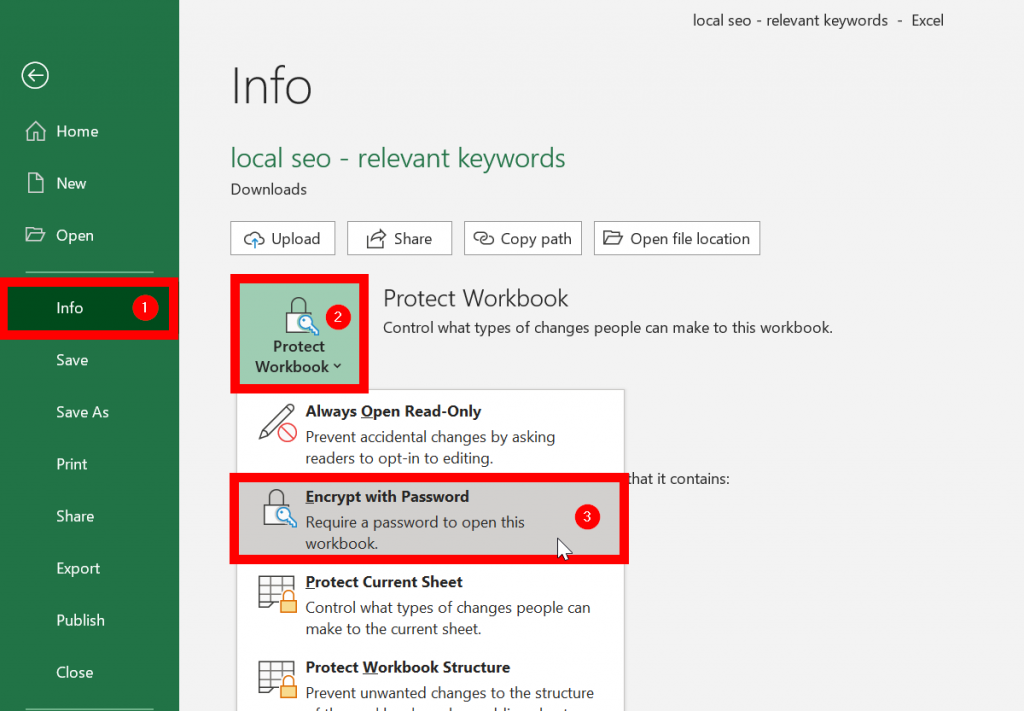
Alternatively, if the file is already in PDF format, simply follow these instructions:
- Open the PDF document in an appropriate Microsoft Office application.
- Select “File.”
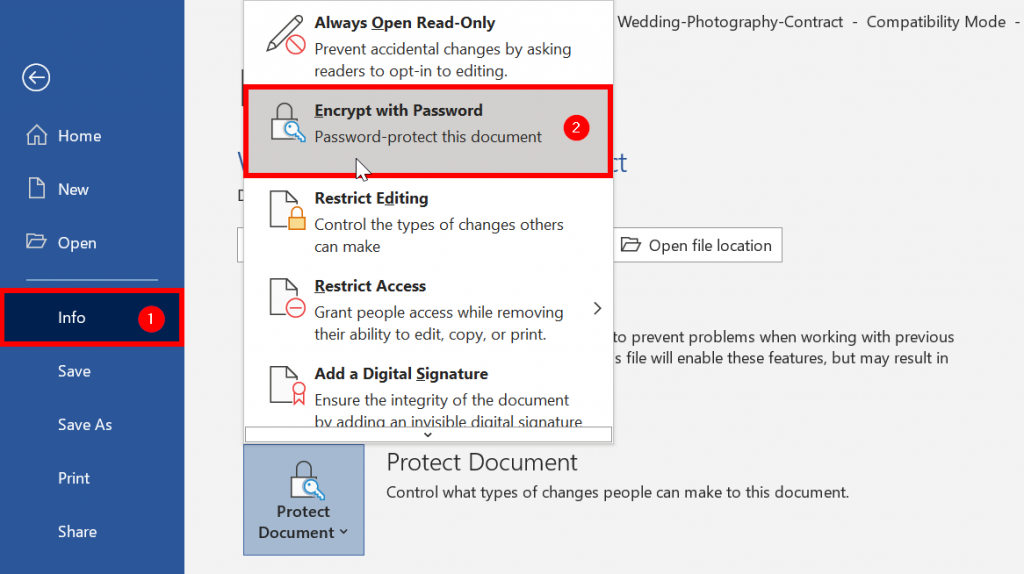
- Select “Info.”
- Select “Protect Document.”
- Select “Encrypt with Password.”
- Enter your password and confirm it.


Adobe Acrobat
Another method is to use Adobe Acrobat Reader. You’ll need the paid version as the free one doesn’t allow you to edit PDFs.
Here’s how to use it to password-protect a PDF file:
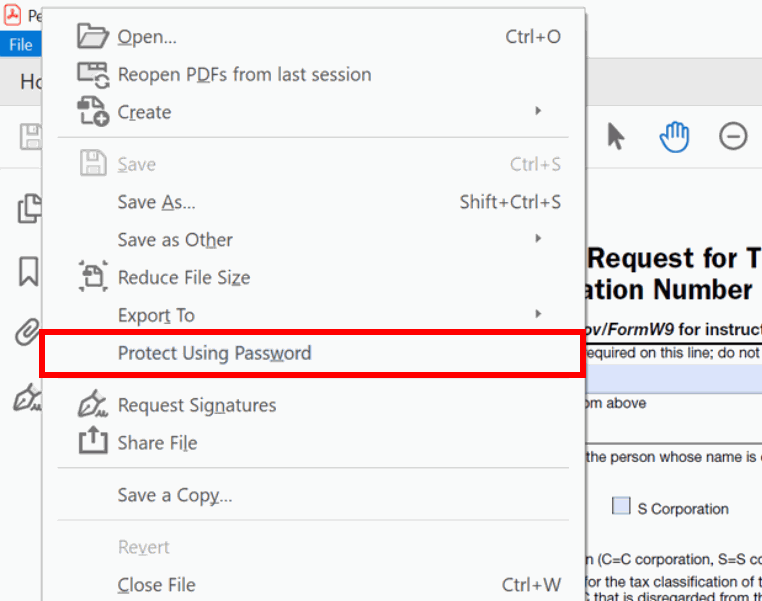
- Open your PDF in Adobe Acrobat Reader.
- Select “File.”
- Select “Protect Using Password.”
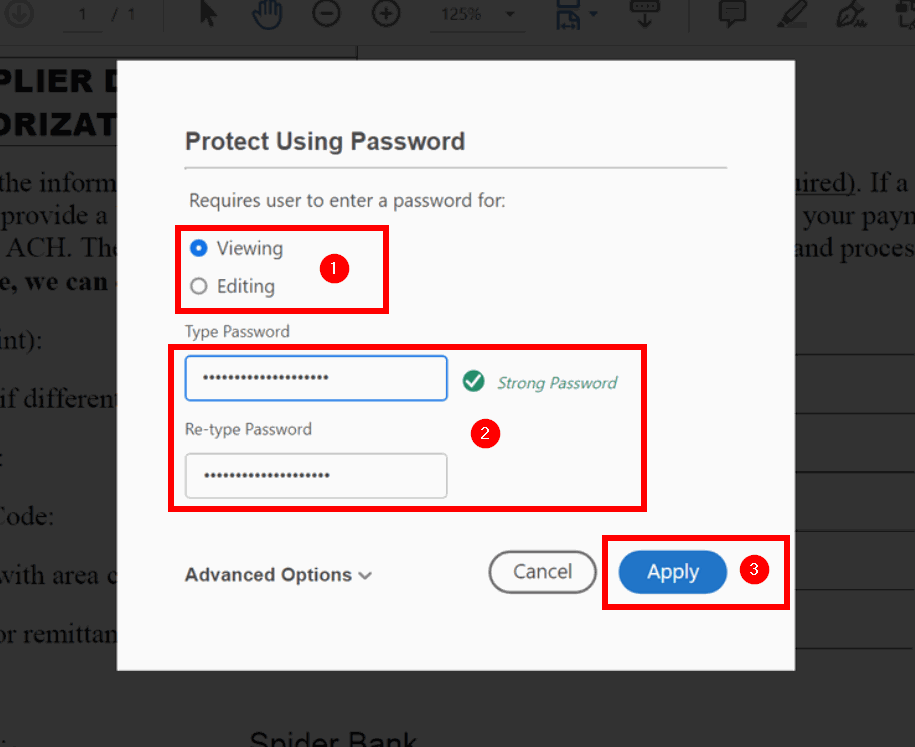
- Choose whether you want the document to be editable or just viewable.
- Enter your password and confirm it.
Free Tools
The last option is to use a free tool. Here are some available options:
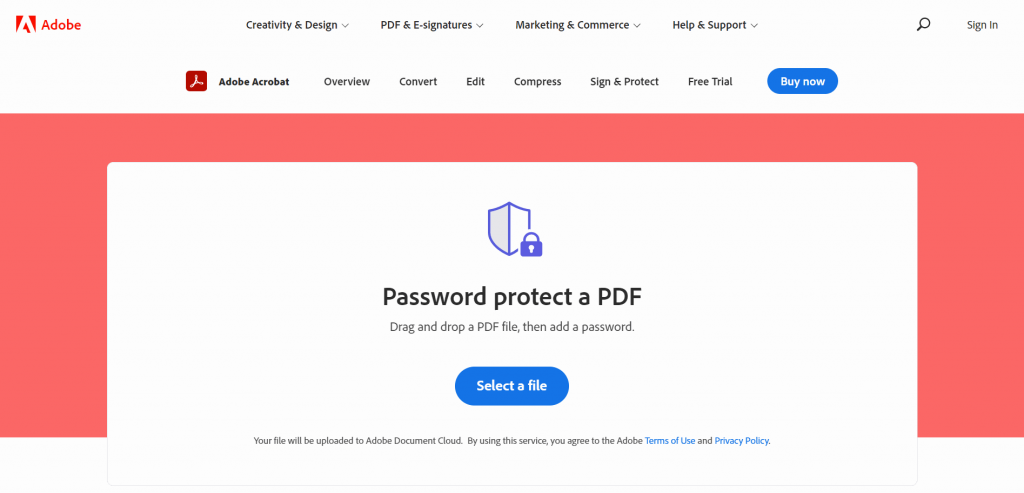
- Adobe’s “Password protect a PDF” tool
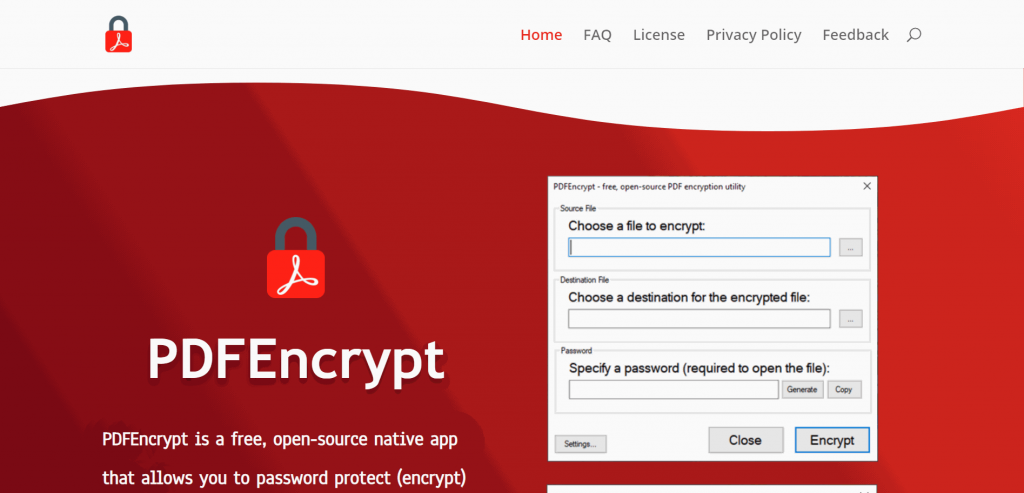
- PDFEncrypt
Adobe offers a free web tool that lets you password-protect any PDF file. Simply drag and drop the file, then add a password of your choice.
PDFEncrypt is a free, open-source tool that makes it easy to password-protect a PDF file. Simply choose a file, create a password, then encrypt it.
Mac
The process is far easier on Mac devices. All you have to do is use the default “Preview” application.
Follow these simple steps:
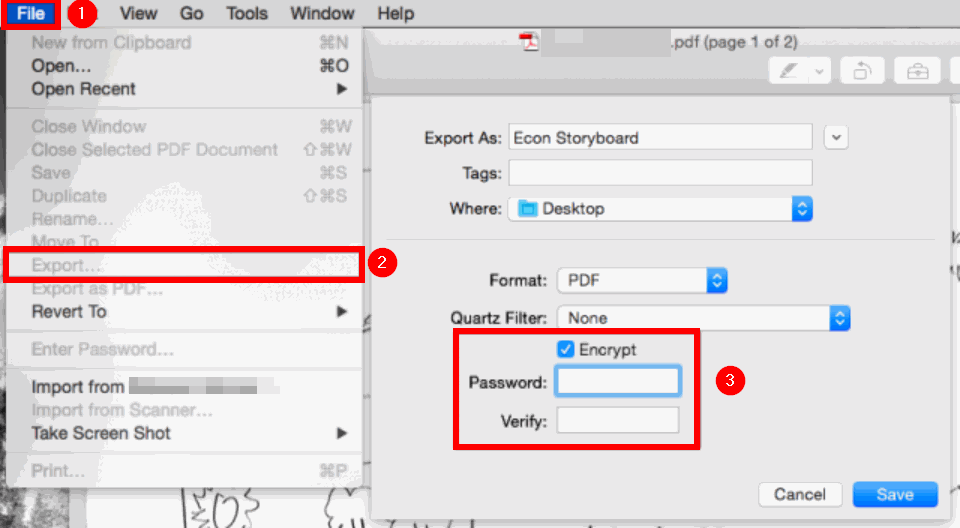
- Open your PDF with the Preview app
- Select “File.”
- Select “Export.”
- Enter a file name.
- Select “Encrypt.”
- Enter your password and confirm it.
Before protecting your PDFs, you should make sure everything is in order with the content structure and information. And, if you need to make any quick adjustments, you can use tools such as Canva’s PDF editor. It works on any device, regardless of your operating system, so it’s easier to use. Also, check how to remove a password from PDF on your Mac in case you or your colleagues may need to unlock the files. Several options are enabling you to remove a password including Adobe Acrobat, Preview, Nitro PDF Pro, Terminal, etc.
Word document
Regarding Microsoft Word documents, password protection is different for Windows versus Mac. Given this, we’ll consider both operating systems below:
Windows
The easiest way to password-protect a Word document is to use the Microsoft Word application. The process is the same as outlined earlier in the PDF file:
- Open or create a document with Microsoft Word.
- Select “File.”
- Select “Info.”
- Select “Protect Document.”
- Select “Encrypt with Password.”
- Enter your password and confirm it.
Mac
Anything related to Microsoft on the Mac operating system will be a little more complicated. But it’s still possible to password-protect a Word document.
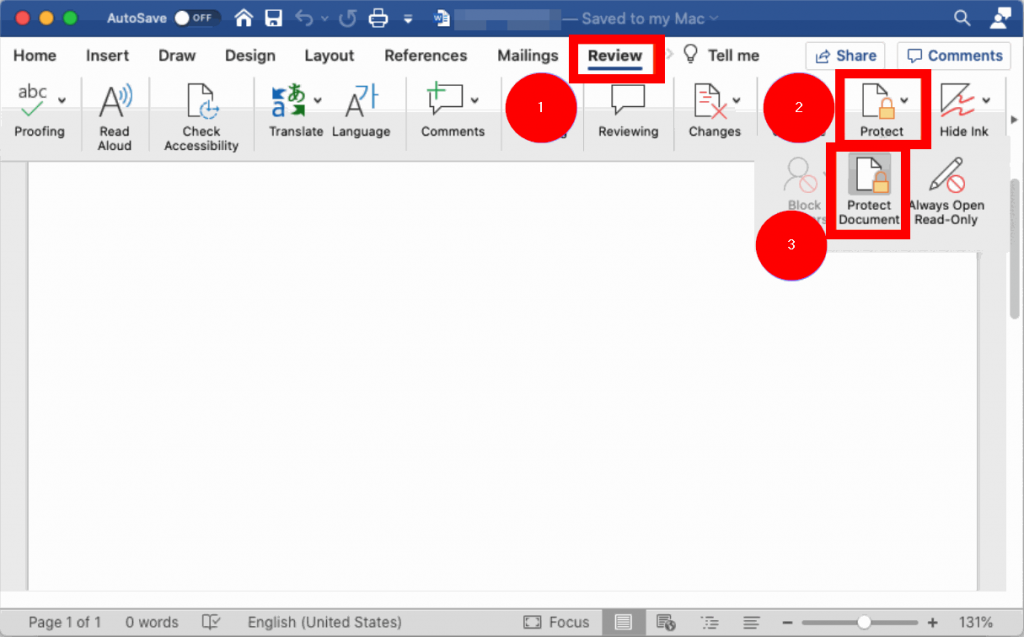
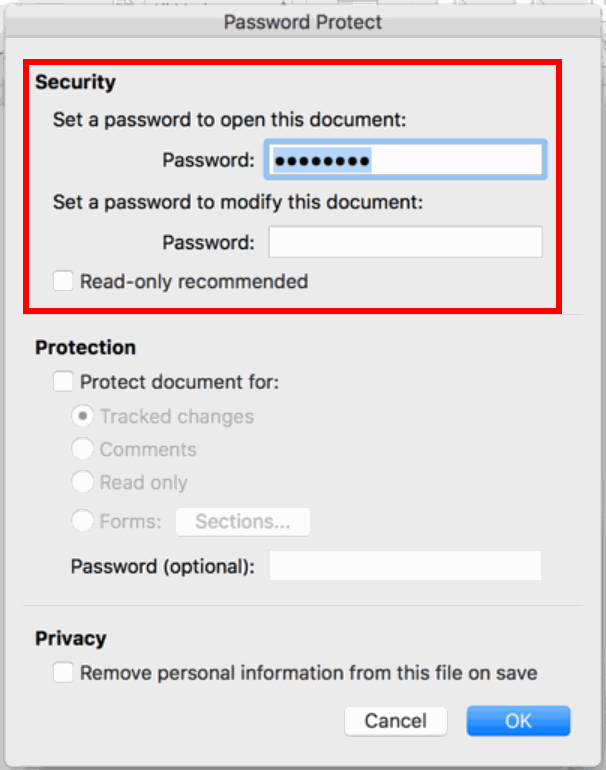
macOS can run Microsoft Word. If you have access, you can simply password-protect your file there. Here’s how to do it:
- Open or create your Word document with Microsoft Word.
- Select “Review.”
- Select “Protect.”
- Select “Protect Document.”
- Enter your password and confirm it.
Google Docs
Password protecting a Google doc is trickier than password protecting other file types. The Google Docs suite doesn’t currently allow you to do it directly, as in a built-in feature. There is a way around this, however. We’ll cover the method below:
Windows
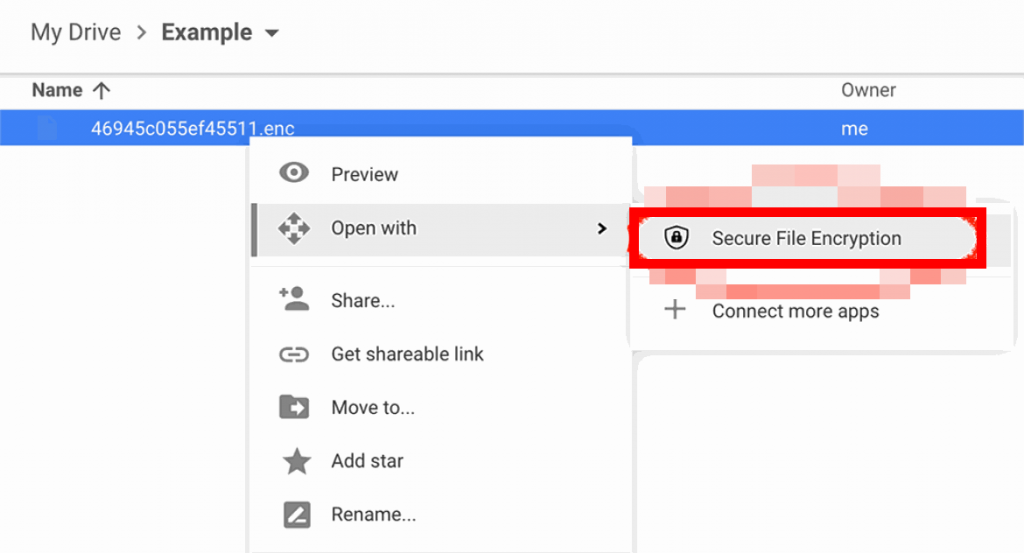
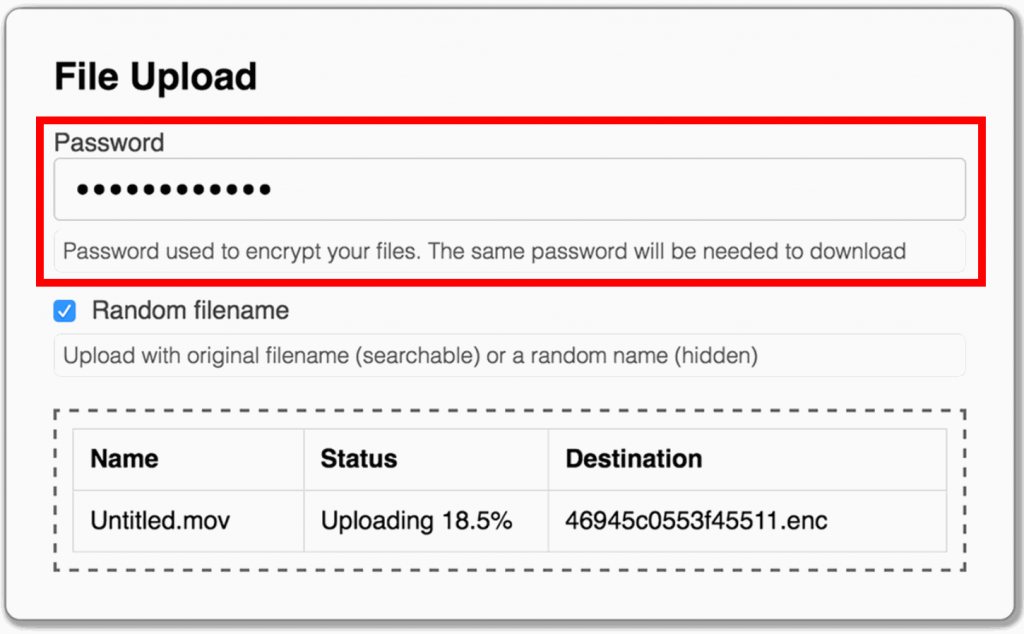
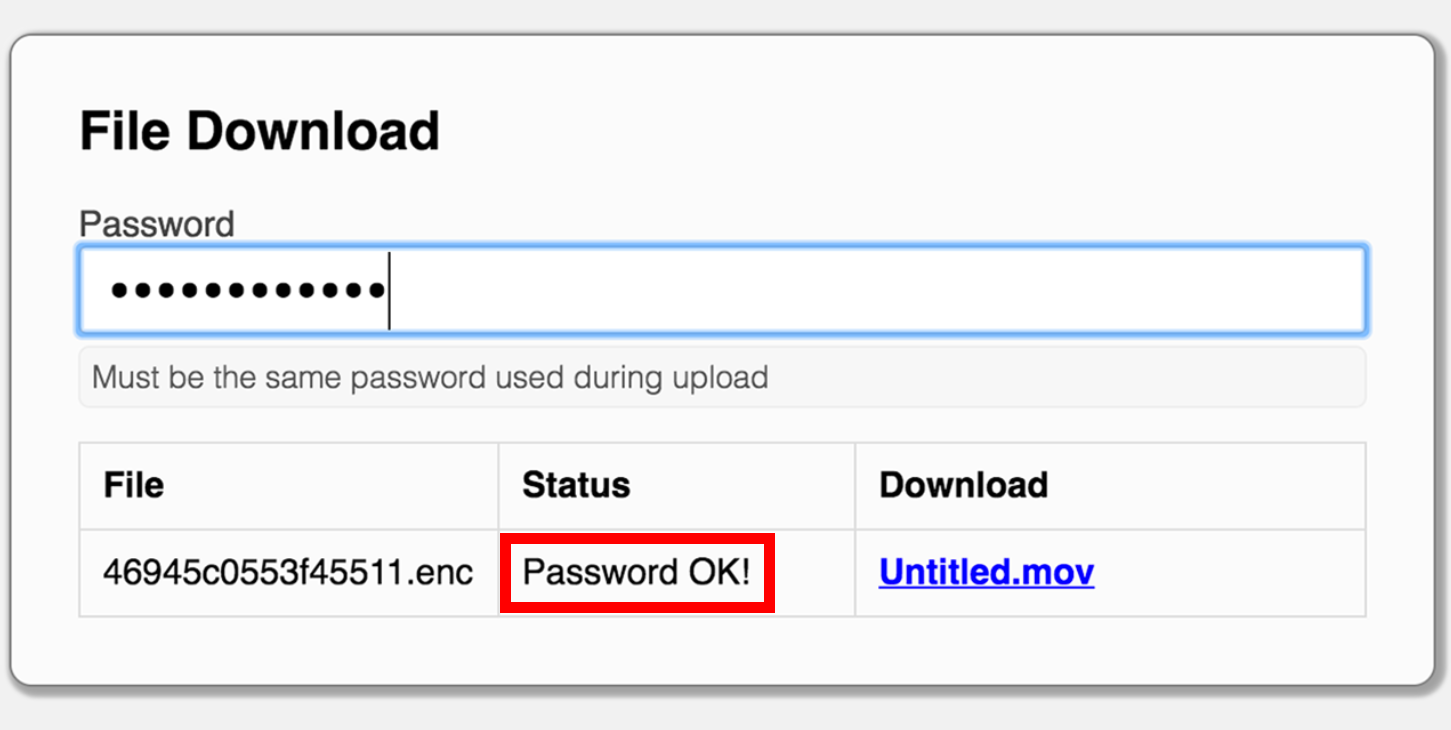
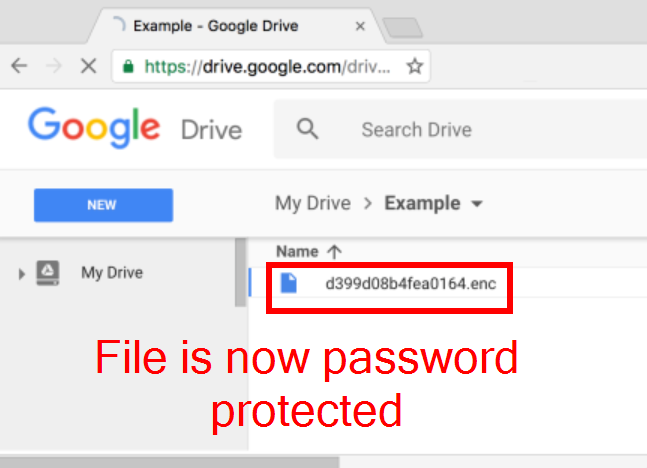
The workaround requires you to download an add-on called Secure File Encryption. This allows you to add a password to a document you upload to your Google Drive. They’ll need to enter the password whenever someone wants to access it.
The step-by-step process is as follows:
- Install Secure File Encryption from the Google Workspace Marketplace.
- Go to your Google Drive.
- Select “New.”
- Select “More.”
- Select “Secure File Encryption.”
- Upload the file you want to password-protect, and confirm.
Mac
The process to password protect a Google Doc is the same on macOS as on Windows. You’ll need to have a Google account, and you’ll need to have Google Chrome downloaded. Then simply follow the steps outlined above.
Excel spreadsheet
Excel spreadsheets are a popular file type used by virtually every business. They usually contain vital data, like financial or customer information. You must ensure these files are secure. Below, we’ll outline how to password-protect an Excel spreadsheet for both Windows and Mac:
Windows
The process to password protect an Excel spreadsheet is very similar to the method used for a Word document. After all, Excel is also a Microsoft program. Here’s how to add a password to your file:
- Open or create a document with Microsoft Excel.
- Select “File.”
- Select “Info.”
- Select “Protect Workbook.”
- Select “Encrypt with Password.”
- Enter your password and confirm it.

Mac
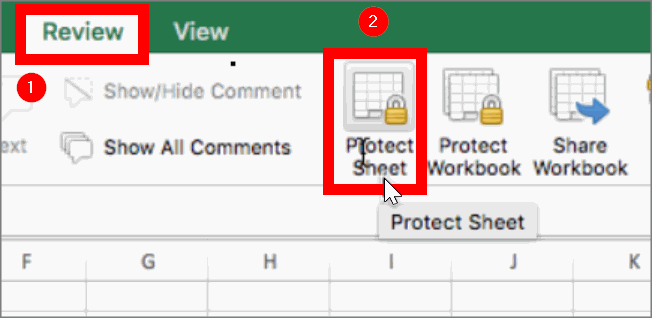
Even though you’re using macOS, you can still use the Microsoft Excel program. With it, you can password-protect your Excel spreadsheets, just like on Windows. Here’s the step-by-step process:
- Open or create a document with Microsoft Excel.
- Select “Review.”
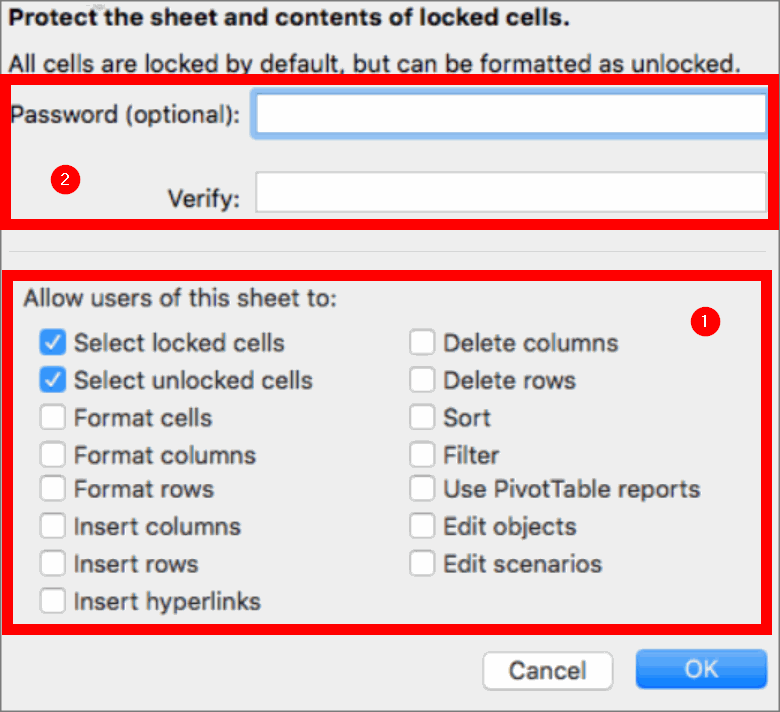
- Select “Protect Sheet.”
- Select what permissions you’ll allow to those with access to the document.
- Enter your password and confirm it.
Google Sheets
Some people prefer Google Sheets to Excel spreadsheets. There’s not much difference between the two, but the process to password-protect files differs. We outline the steps for password-protecting both operating systems below:
Windows
Unfortunately, Google Sheets doesn’t have a built-in password protection feature present. Much like with Google Docs, you must work around the issue.
You could use the Secure File Encryption strategy we covered in the Google Docs section. That works for any file uploaded to Google Drive.
Mac
The process is the same on macOS as it is for Windows. If you have Google Chrome installed and a Google account, you can password-protect a Google Sheets document. Follow the steps outlined in the Windows section.
Method 2: Use an Electronic Signature Software
The first method was very complex and can be rather confusing. A much easier solution is to use electronic signature software. These are applications that allow you to digitally sign, send, and receive documents, contracts, and agreements online.
Not only do these tools make it easy to add signatures, but they also ensure the documents are secure. Instead of spending countless minutes individually securing each file, you can save time with electronic signature software. The documents are automatically secured.
There are many electronic signature software options available. Signaturely is one of the best.
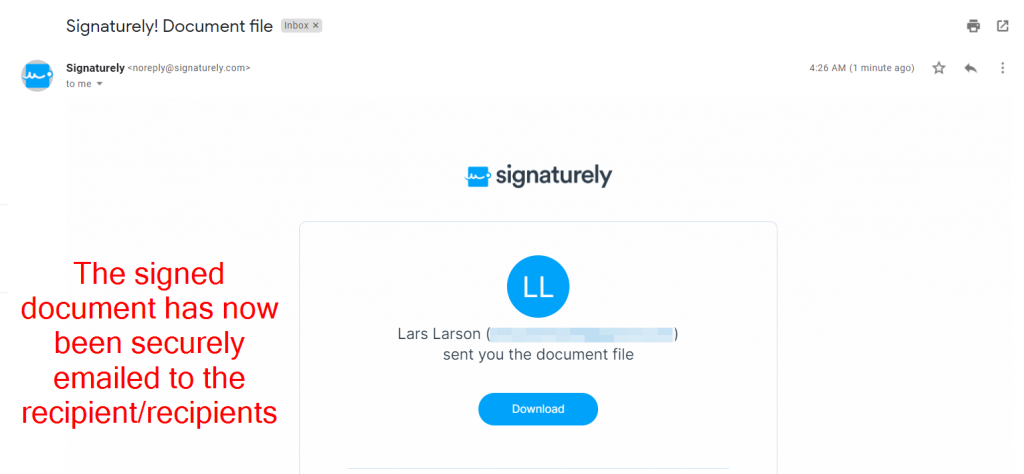
How to Use Signaturely to Send Documents Securely via Email

Signaturely is an e-signature solution that allows you to sign documents online electronically. You can create your digital signature — typed or drawn — and add it to easily uploaded documents. You can then send these documents to other contract parties.
With Signaturely, your data is safe, whether using a computer or sending and signing documents from an iPhone. The application has robust firewalls in place to ensure no breaches occur. Your valuable information is hosted in Amazon-managed data centers. The platform also uses 256-bit encryption as another added security measure.
The process of signing and sending a document via email is really easy with Signaturely. Here’s how it works, step-by-step:
- Go to Signaturely.com and sign up for a free account.
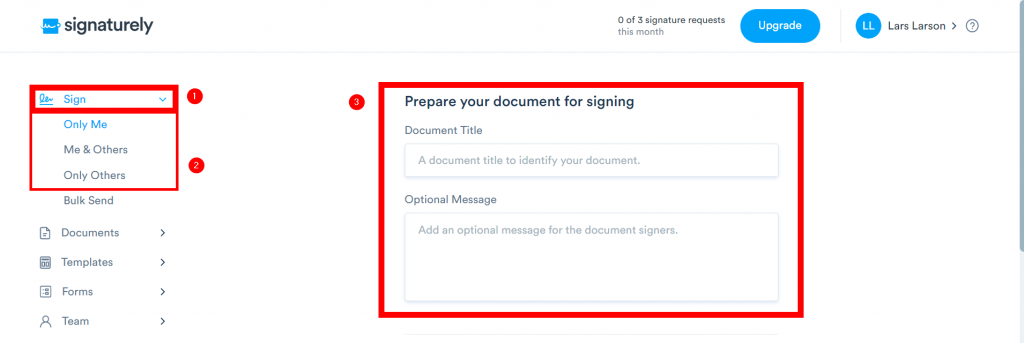
- Select “Sign.”
- Select “Only Me,” “Me & Others,” or “Only Others.”
- Give your document a title and optional message.
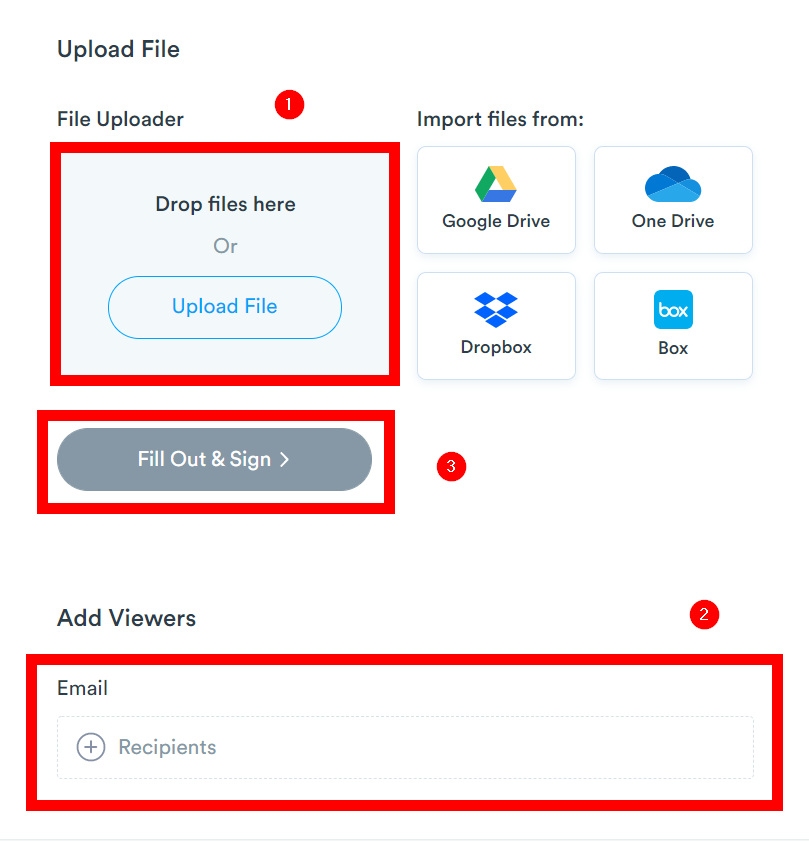
- Upload a file.
- Add email recipients.
- Select “Fill Out & Sign.”
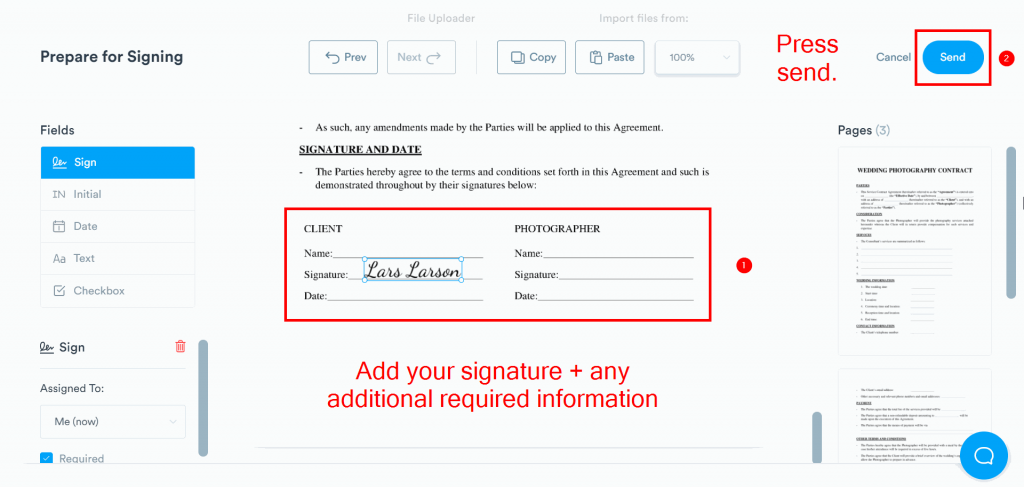
- Use the editor to add your signature and any additional information.
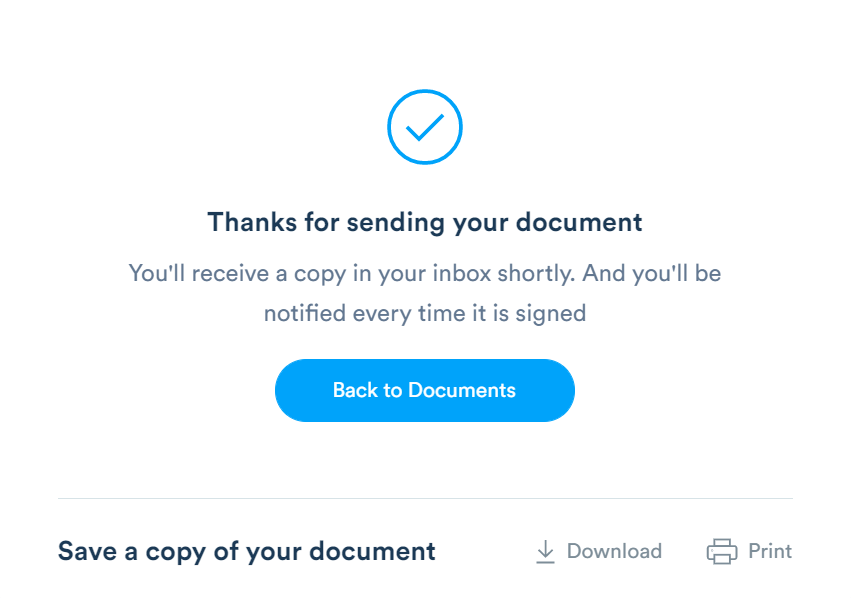
- Select “Send.”
Method 3: Encrypt Your Email
Email encryption is another method you can use to ensure your email documents are safe. When it comes to security, encryption is a step up from password protection. It’s a more advanced defense against data breaches. We’ll cover the details below:
How to send and open confidential emails
To furter enhance protection against data breaches, incorporating security tools like Clean Email can help filter out spam and phishing emails, ensuring that only messages from verified sources reach your inbox.
So, how do you send encrypted emails? Well, it entirely depends on the email service provider you’re using. The process is different in Gmail than in Outlook or Yahoo. Below, we’ll detail the specific steps for each one:
Gmail
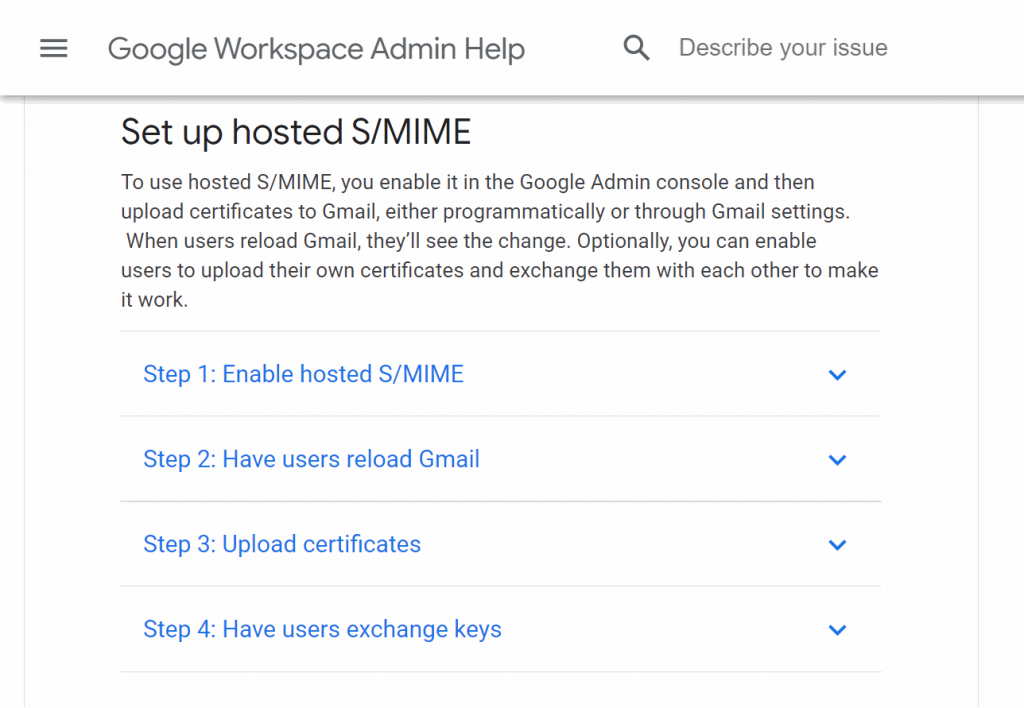
The good thing about Gmail is that it has a built-in encryption feature. However, to send an encrypted email, both you and the email recipient must have the feature enabled. If the person you send the email to doesn’t enable the encryption feature, the email you sent won’t be encrypted.
Given this, you must ensure they’ve enabled encryption on their end.
Enabling encryption on Gmail is a rather drawn-out, 4-step process. Google has a helpful guide that covers this.
After both you and the email recipient have encryption enabled, here’s how you send an encrypted email:
- Select “Compose.”
- Select the lock icon to the right of the recipient.
- Select “View details.”
- Select the appropriate level of encryption.
Outlook
Like Gmail, Outlook requires you to go through a lengthy process to enable encryption. Here’s the official Microsoft how-to guide to do it.
Once that’s out of the way, here’s how you encrypt a single email:
- Compose an email.
- Select “File.”
- Select “Properties.”
- Select “Security Settings.”
- Select “Encrypt message contents and attachments.”
- Select “Send.”
Yahoo
Unfortunately, when it comes to Yahoo’s email service, there’s no specific built-in encryption feature. Third-party plugins are the only way to encrypt an email on this platform. One plugin you can use is The GNU Privacy Guard.
Even with this plugin, the process of encrypting emails is technical, long, and complex. We recommend you use one of the other methods outlined in this post to save time and effort.
Hotmail
Given that Hotmail is now Outlook, the email encryption process is covered in that subheading.
Method 4: Encrypt Your Email Attachments
Even if you can encrypt your email, it’s not guaranteed that your attachment will be encrypted. It’s usually the files attached to our emails that are of the most concern regarding security.
How to send a secure email attachment
There are several ways that you can encrypt your email attachments. It depends on which email service provider you’re using. All popular platforms will be considered below:
Gmail
As with method 3, you must activate Gmail’s built-in encryption feature. To do so, follow the information outlined in Google’s how-to guide.
After you’ve done that, follow these steps:
- Select “Compose.”
- Select the lock icon to the right of the recipient.
- Select “View details.”
- Select the appropriate level of encryption
Outlook
To encrypt your email attachments on Outlook, you’ll need to enable encryption. You can follow this complex process by using Microsoft’s official how-to guide.
Once you’ve done so, here’s the step-by-step process to encrypt the email attachment:
- Compose an email.
- Select “File.”
- Select “Properties.”
- Select “Security Settings.”
- Select “Encrypt message contents and attachments.”
- Select “Send.”
Yahoo
Yahoo doesn’t allow you to encrypt emails, let alone attachments; there’s no built-in feature at present. The only way to selectively encrypt your email attachments is to use a third-party tool or feature.
Hotmail
As stated earlier, Hotmail is now Outlook. Refer to the earlier subheading for more information.
FAQs
Sending documents securely via email is important because of potential cyber threats like hackers. Data security is a huge concern; businesses must ensure secure their contracts, payrolls, and customer information.
The safest way to send a document via email is to use encryption. This can be done by encrypting individual emails and email attachments. However, an easier way is to use electronic signature software, such as Signaturely.
The easiest way to send a secure document is to use electronic signature software such as Signaturely. These applications make signing and sending contracts and agreements easy and ensure they’re secure.
Yes, you can send a secure email document for free. Many of the strategies outlined in this post, such as the free PDF tools, can be used for free.
Send Documents Securely: Conclusion
Businesses must ensure their data is secure from cyberattacks and data breaches. Documents like customer information, payroll, and contracts must be kept away from outside, prying eyes.
This article covered four methods you can use to ensure the documents you send via email are secure (from scan to email). These strategies will keep your company’s vital data under lock and key.
Are you looking for an easy, safe, and secure way to send documents by email? Try Signaturely for free today.