

We know how important signing a PDF is. Many businesses have shifted to electronic signatures to expedite their processes, minimize expenses, and make it as easy as possible for anyone to sign documents.
In this article, we’ll show you how to sign a PDF on virtually any device, comparing all forms and telling you when it’s best to use them. By the end of the article, you’ll know exactly which one to use and when to use it.
Let’s get started.
How to Sign a PDF on Windows
Windows is the most used OS worldwide. Here’s how to sign a PDF if you have a Windows PC:
Using an Electronic Signature Software
Electronic signature software or electronic signature apps usually refer to digital platforms that let you create and use electronic signatures online. With them, you can not only sign documents but create documents to be signed with all the legality of paper documents.
Here are the best electronic signature platforms:
Signaturely

Signaturely is a free, easy-to-use e-signature solution, perfect for anyone who wants to get legally binding digital signatures on forms, proposals, and agreements online without using Adobe.
Signing a PDF with Signaturely is easy. Here’s how to do it:
Step 1: Upload your PDF
Upload your PDF to the platform and add signature fields wherever they’re needed. You can then add your signature and send it to the other signees.
Step 2: Have your PDF signed
Your signees will be notified via email that a document needs their signature. Signaturely will then guide them step by step through the signing process, from creating their digital signature, if they don’t have one, to teaching them how to sign the document.
Step 3: Keep track of your PDF
You can use the Signaturely platform to stay in the loop. The platform will let you know who has signed the document and who hasn’t, and it will even use gentle notifications to remind users to sign.
You can use Signaturely for free or sign up for a business account with unlimited templates and signature requests right here.
Using Adobe Sign

Developed and backed by Adobe Acrobat Pro DC, Adobe Sign is an online platform allowing users to sign PDF documents using multiple devices, including PCs. Check out our Adobe Sign vs. DocuSign article.
Here’s how to use it:
Step 1: Upload your documents
Connect your Google Drive, Microsoft 365, Box, or any other platform on which your documents are stored. Upload your documents to the Adobe Sign platform.
Step 2: Prepare your PDFs for signing
Once your documents have been uploaded to the platform, add your signees’ email addresses and a personal message. Then add the PDF that requires their signature.
Use the drag-and-drop editor to add signature fields, and once you’re done, you can send the document to the signees to be signed.
Step 3: Wait for the PDF to get signed
Once your document has been signed, Adobe sends you an instant notification to let you keep track of approvals. You can also use your dashboard to track all documents, informing you about their status. If you’re not a fan of Adobe, here are our top Adobe Sign competitors to consider.
PDFelement

PDFelement is another PDF editor you can use with both Windows and Mac. Its user-friendly interface makes it easy to edit PDF documents in detail. With this platform, you can easily create, edit, and convert PDFs to your liking, making it a good alternative to Adobe software.
Here’s how to use it:
Step 1: Open or create your PDF
PDFelement allows you to create new PDFs or open existing PDFs with its “One-Click PDF Creation” feature, which allows you to convert files into PDFs with just one click.
Step 2: Prepare your document
Once the PDF is ready, you can start preparing it for its signature. You can not only add signature files to your PDFs but also add comments, drawings, stamps, and attachments to your PDF file to help contextualize your document.
Step 3: Sign your document
Once you’ve prepared your document, you can sign in with your Signature ID. You can use the platform to create a new ID or to browse your computer and export an ID into PDFelement. Both you and your signees must go through this step separately to sign the PDF.
Since PDFelement doesn’t guide the people who need to sign your document, you’ll have to let your users know how to use it.
3 Ways of Signing a PDF on Windows Compared
| Signaturely | Adobe Sign | PDFelement | Winner | |
| Cost | Limited free version | $9.99 per month | $69 per year | Signaturely |
| Ease of Use | Very easy | Somewhat easy | Average | Signaturely |
| Quality | Extremely high | High | Average | Signaturely |
| G2 rating | 5 stars | 4.3 stars | 4.5 stars | Signaturely |
Signing a PDF on Mac
Signing a PDF on a Mac is much the same as signing a PDF using Windows. Here’s how to do it:
Using an Electronic Signature Software
As mentioned, electronic signature platforms make signing PDFs easy for everyone involved.
Here are the best electronic signature platforms to sign PDFs on a Mac:
Signaturely

Signaturely is a free, easy-to-use e-signature solution, perfect for anyone who wants to get legally binding online signatures on practically any digital document.
Here’s how to use Signaturely to sign a PDF on a Mac:
Step 1: Upload your PDF
Upload your PDF to the platform and add signature fields wherever they’re needed. You can then add your signature and send it to the rest of your signees.
Step 2: Have your PDF signed
Your signees will be notified by email that there’s a document requesting their signature. Signaturely will then guide them step by step through the signing process, from creating their online signature, if they don’t have one, to teaching them how to sign the document.
Step 3: Keep track of your PDF
You can use the platform to stay in the loop. It will let you know who has signed and who hasn’t. It will even use gentle notifications to remind users to sign your document.
You can use Signaturely for free or sign up for a business account with unlimited templates and signature requests right here.
Adobe Sign
Adobe Sign can also be used to sign PDFs on a Mac and many other devices. All you need to do is connect to the cloud platform where you have your documents, like Google Drive, Microsoft 365, Box, or many others, to export your PDF, set it up, and send it to be signed.
Once your document has been signed, Adobe sends you an instant notification to let you keep track of approvals.
DocuSign

DocuSign is another online signing platform that allows users to sign documents from virtually any device, including a MacBook.
The platform is good for users looking for advanced settings, although it may be overwhelming for a new user. Users can also keep track of the status of their signatures and even write contracts in over 40 languages. There are free alternatives to DocuSign if you’re looking for a more affordable solution.
PDFelement
PDFelement is a PDF editor available for both Windows and iOS. It features a very simple UI, allowing you to create, edit, and convert PDFs to your liking, making it a good alternative to Adobe software.
Although its main focus is PDF editing, this software also has electronic signature capabilities, allowing you to add signature fields to your PDFs.
PandaDoc
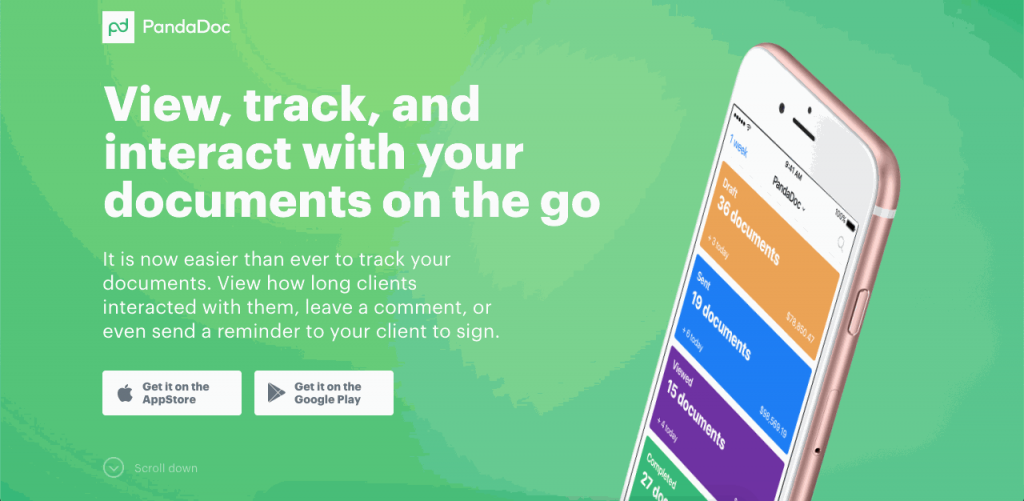
PandaDoc is another electronic signature platform that allows users to set up PDFs and include them in interactive proposals with online signature capabilities.
The platform lets you keep up with your proposals, letting you know who has interacted with them and keeping you informed about the process. PandaDoc also has a responsive app for Android and iOS, and the platform works well with Windows and macOS. Here are some PandaDoc competitors.
Using a Digitally Drawn Signature
Here’s how to set up and use a digitally drawn signature for signing PDFs and other documents online:
Using your mouse or trackpad
Although iOS doesn’t have a preinstalled drawing app, you can either download an app like Sketch or Patina or use Signaturely’s Online Signature Maker if you don’t want to download anything.
To use Signaturely’s Online Signature Maker, go to the online signature maker and select “Draw your signature.” Then draw your signature using your mouse, trackpad, or stylus, and personalize your drawing.
Once you’re done, download the file as a PNG, and it will be ready to use.
Using your fingers on a touchscreen
You can also use almost any drawing app to draw a signature. Simply open your drawing app, select the brush and color, and start drawing your signature.
When satisfied with the result, you can select “Save Signature” and send it to your email or Mac with Bluetooth.
Using your keyboard and then choosing a font
Lastly, you can avoid drawing entirely and type your signature with Signaturely’s Online Signature Maker. Select “Type your signature,” use the text box to type your name or initials, and choose a font to personalize it.
Once you’re happy with it, you can download it. Your new signature will be saved on your computer as a PNG file and will be ready to use.
Using Apple Preview
You can also use Apple Preview to sign your PDFs. Here’s how:
Step 1: Create your virtual signature
To start using Preview to sign your PDF, you’ll first have to open your PDF and then create your virtual signature by drawing it with your TrackPad, taking a photo of it with your MacBook’s camera, or drawing it using your iPhone or iPad.
Step 2: Add your signature to your PDF
Now that you have recorded an image of your signature to Preview, you can start using it to sign your documents. Just open your PDF on Preview, and go to the Signature button as you did before. Then click on your signature, and place your signature as you like.
Once your signature is properly placed, you can save the document and share it with the other signees.
Using Apple Mail
Lastly, you can also sign documents on a Mac through Apple Mail. Here’s how:
Open your Mail app, then go to Mail. Click Preferences, and select Signatures. Once you’re there, you can select the email account you want to link a signature to in the left column. You can name your signature in the middle column to easily track it. Finally, you can create your signature in the right column.
Once you have your signature, you can start using it to sign PDFs in your Mail app. You can also automatically add your signature to emails as a way to end them.
4 Ways of Signing a PDF on Mac Compared
| Electronic Signature Software | Digitally Drawn Signature | Apple Preview | Apple Mail | Winner | |
| Cost | Free versions | Free | Free | Free | Tie |
| Ease of Use | Very easy for all signees | Fairly easy | Fairly easy | Easy | Signaturely |
| Document management capabilities? | Yes | No | No | No | Signaturely |
| Team collaboration? | Yes | No | No | No | Signaturely |
As we can see, although there are multiple ways to sign a PDF on a Mac for free, you’ll likely encounter difficulties if you use any of those options for anything more than just a casual signature.
With no advanced capabilities other than adding a simple digital signature, Signaturely is superior for managing documents, helping signees to sign your PDFs, and keeping track of your contracts once you’ve sent them out for signing.
Signing a PDF on Android
Here is a comparison of a few ways to sign a PDF on Android:
Using Adobe Acrobat Reader
Adobe Acrobat Reader has an app in Google Play. Here’s how to sign with it:
Step 1: Get and set up the app
Go to the Google Play Store on your Android device and download the Adobe Reader app. Once you’ve downloaded the app, go through the first few steps to finish setting it up and ensure it’s ready for signing PDFs.
Step 2: Open the PDF
Now that your app is ready to go open your PDF file in the app. You can search for the file in-app or find it outside the app and open it with Adobe Reader.
Step 3: Create your signature
You’ll have to create a signature if this is your first time using the app to sign a document. To do this, look at the bottom right corner of the screen and find the pen icon. Tap on it and select “Fill & Sign?” then select “Create Signature.” Once you’re there, draw a signature and tap on “Done.”
Step 4: Sign PDF
Now that you have your signature ready, you can tap anywhere on your PDF to place it, adjusting it as needed.
When you’re done signing, tap on the checkmark at the top left corner, and the signed document will be saved and ready to share.
Using Adobe Fill & Sign
Another Adobe Android app you can use for signing documents is Adobe Fill & Sign. Since Adobe Fill & Sign is better for forms, you can use the app to complete a form that needs signing and finish it with your signature. Here’s how to use it:
Step 1: Get and set up the app
Download the Adobe Fill & Sign app from your device’s Google Play Store. Once you’ve downloaded the app, go through the first few steps to finish setting it up and make sure it’s ready to start signing PDFs.
Step 2: Open the PDF
Once your app is ready to go, you can open your document by opening the app and tapping on the plus sign icon in the middle of the screen to choose the form you want to fill out from your device.
When you open the file, you can rearrange it and edit it with limited options to make it easy to fill.
Step 3: Create your signature
If you’ve never used the app before, the app will ask you to create a signature. To do this, look at the bottom right corner of the screen and find the pen icon. Tap on it and select “Fill & Sign?” then select “Create Signature.” Once you’re there, draw the signature you’ll use and tap on “Done.”
If you’ve created the signature already, tapping the pen icon will make your signature accessible instead.
Step 4: Sign your document
Now that you have your signature ready to go, you can tap anywhere on your PDF file to place your signature, adjust it, and resize it to make it fit where it needs to be.
When you’re done signing, tap on the checkmark at the top left corner, and the signed document will be saved and ready to share.
Using Adobe Sign Mobile
Adobe Sign Mobile is the last Adobe app you can use to sign PDFs on Android. This app is great for sending PDFs to sign.
Here’s how to use it:
Step 1: Get and set up the app
Go to the Google Play Store on your Android device, and download Adobe Sign Mobile. Once you’ve downloaded the app, go through the first few steps to finish setting it up and ensure it’s ready to start signing PDFs.
Step 2: Open the PDF
On the main menu, tap on “Send for Signature.” Then tap on “Documents.” Here, you can add a document by browsing your phone or using the camera app to scan your document.
Step 3: Set up your signees
Now that you’ve selected or scanned your document, you can select your recipients and even choose to have it signed in the order you add them.
You can also add a message for your signees to see before signing, personalizing it with your signees’ names.
Step 4: Send your document
Now that your document is ready, you can send the document to your recipients to be signed. As your recipients sign the document, you’ll be notified by email. The platform will send the document in the correct order.
Once everyone has signed the document, all signees will receive a fully signed version of the document.
Using a non-Adobe Signature App
You can also use a non-Adobe Signature App like SignMyPad. Here’s how to sign a PDF with it:
Step 1: Get and set up the app
Go to the SignMyPad website, and download the APK from there. You may need to tweak your admin permissions to start using an app downloaded outside the Google Play Store.
Step 2: Open the PDF
Open the app and follow its instructions to open a PDF. You can also open a PDF from your phone by choosing SignMyPad to open it.
Step 3: Sign the PDF
Once you’ve opened your PDF, tap on the “Add” button in the top right corner and tap on “Signature.” Then sign your name in the box, and drag your signature to the required PDF area.
Step 4: Finish and share it
Once you’ve signed your PDF document fully, you can tap on the green checkmark to complete the process and save your signed PDF. You can now share it by attaching it to an email or by using Dropbox.
4 Ways of Signing a PDF on Android Compared
| Adobe Acrobat Reader | Adobe Fill & Sign | Adobe Sign Mobile | SignMyPad | Winner | |
| Cost | Free | Free | Free | $3.99 | Adobe Platforms |
| Ease of Use | Easy to use | Very easy to use | Easy to use | Easy to use | Adobe Fill & Sign |
| Quality | High | High | High | High` | Tie |
| Sharing capabilities | Good | Good | Excellent | Average | Adobe Sign Mobile |
Signing a PDF on iOS / iPhone and iPad
There are multiple ways to sign documents on iPhone and iPad, including PDFs. Here are a few:
Using Native iOS Apps that Support Markup
Your iOS devices likely have a built-in Markup feature that will make it easy to sign your documents with a native app. Here’s how:
Step 1: Open your PDF
Open your PDF file on your device, and look for the Markup icon. The icon looks like a small pen-tip icon, usually in the top right-hand corner. Tap on it, and select “Signature”.
Step 2: Create your signature
If you’ve never used the feature before, you’ll have to draw a signature using your finger or Apple Pencil. You can also use your pre-set signature or create a new signature for your PDF.
Step 3: Place your signature
Now that your signature is ready, you can place it on the document, resizing it to fit the right area.
Step 4: Save your signed PDF document
Once your document is signed, you can tap “Done” to save the signature. Your document is now ready to be shared or saved.
Using Adobe Acrobat Reader
Adobe Acrobat Reader has an app in the App Store. Here’s how to sign a PDF with it:
Step 1: Get and set up the app
Go to the App Store on your iOS device, and download Adobe Reader. Once you’ve downloaded the app, go through the first few steps to finish setting it up and ensure it’s ready to start signing PDFs.
Step 2: Open the PDF
Now that your app is ready to go, open your PDF file in the app. You can search for the file in-app or find it outside the app and open it with Adobe Reader.
Step 3: Create your signature
Once you’ve opened the file, look at the bottom right corner of the screen, and find the pen icon. Tap on it and select “Fill & Sign?” then select “Create Signature.” Once you’re there, draw your signature and tap on “Done.”
Step 4: Sign your document
Now that you have your signature ready to go, you can tap anywhere on your PDF to place your signature, adjusting it to where it needs to be.
When you’re done signing, tap on the checkmark at the top left corner, and the signed document will be saved and ready to share.
Using Adobe Fill & Sign
Another Adobe Android app you can use for signing documents is Adobe Fill & Sign. Since Adobe Fill & Sign is better for forms, you can use the app to complete a form that needs signing and finish it with your signature.
Here’s how to sign a PDF with it:
Step 1: Get and set up the app
Go to the App Store on your iOS device, and download the Adobe Fill & Sign app. Once you’ve downloaded the app, go through the first few steps to finish setting it up and make sure it’s ready to start signing PDFs.
Step 2: Open the PDF
Once your app is ready to go, you can open your document by opening the app and tapping on the plus sign icon in the middle of the screen to choose the form on your device that you want to fill.
When you open the file, you can rearrange it and edit it with limited options to make it easy to fill.
Step 3: Create your signature
If you’ve never used the app before, it will ask you to create a signature. To do this, look at the bottom right corner of the screen, and find the pen icon. Tap on it and select “Fill & Sign?” then select “Create Signature.” Once you’re there, draw your signature, and tap on “Done.”
If you’ve created the signature already, tapping the pen icon will make your signature accessible instead.
Step 4: Sign PDF
Now that you have your signature ready to go, you can tap anywhere on your PDF to place your signature, adjust it, and resize it to make it fit where it needs to be.
When you’re done signing, tap on the checkmark at the top left corner, and the signed document will be saved and ready to share.
Using Adobe Sign Mobile
Finally, the last Adobe app you can use to sign PDFs on your iOS device is Adobe Sign Mobile. This app is a great way to send PDFs to sign.
Here’s how to use it:
Step 1: Get and set up the app
Go to the App Store on your iOS device, and download the Adobe Sign Mobile app. Once you’ve downloaded the app, go through the first few steps to finish setting it up and make sure it’s ready to start signing PDFs.
Step 2: Open the PDF
On the main menu, tap on “Send for Signature.” Then tap on “Documents.” Here, you can add a document by browsing your phone or using the camera app to scan your document.
Step 3: Set up your signees
Now that you’ve selected or scanned your document, you can select your recipients and even choose it to be signed in the order you add them.
You can also add a message for your signees to see right before signing, personalizing it with your signees’ names.
Step 4: Send your document
Now that your document is ready, you can send it to your recipients to get it signed. You’ll be notified by email as your recipients start signing the document. The platform will send the document in the correct order.
Once everyone has signed the document, all signees will receive a fully signed copy of the document.
Using a non-Adobe Signature App
You can also sign a PDF outside the Adobe sphere with apps like PDF Expert 7. Here’s how to sign a PDF document with this app:
Step 1: Download the app
Go to the App Store and download PDF Expert. Install it, and go through the first steps until you can reach the dashboard.
Step 2: Open your PDF
Tap on the plus sign, and select the PDF you want to open. You’ll have to provide access to your gallery to start browsing your documents.
Step 3: Create your signature
Now that you have your PDF open, tap on “Signature,” and create a new signature that you can use to sign your document. If another person besides you will be signing the document, tap on “Customer Signature” instead.
Step 4: Sign and save your PDF document
Now that you have your signature, you can place it into the PDF, drag it, and resize it to fit wherever you want.
4 Ways of Signing a PDF on iPhone / iOS and iPad Compared
| Markup Tool | Adobe Acrobat Reader | Adobe Fill & Sign | Adobe Sign Mobile | PDF Expert 7 | Winner | |
| Cost | Free | Free | Free | Free | Free | Tie |
| Ease of Use | Very easy to use | Easy to use | Easy to use | Easy to use | Easy to use | Markup Tool |
| Quality | High quality | Very high quality | High quality | High quality | High quality | Adobe Acrobat Reader |
| Sharing capabilities | Average | Good | Good | Excellent | Good | Adobe Sign Mobile |
How to sign a PDF: Conclusion
There are multiple ways to sign your PDFs on all devices, but there’s hardly a better way to get them signed than Signaturely.
Sign up for Signaturely for free today.