Gone are the days of requiring a handwritten signature on documents. With so much of what we do taking place online, online signatures are now just as viable and binding as handwritten ones. Signaturely was designed to take a physical signature and bring it to the digital space. Creating a digital signature is easier than ever, even on non-signature platforms. Here’s how to do a wet signature on Word.
Microsoft Word is the world’s leading word processor, so you may need to create a wet signature on a Word document. A wet signature is a term used for a physical, handwritten signature. Here’s our complete guide to creating a wet signature on Microsoft Word.
How to Insert a Wet Signature on Word
Signing a document in Microsoft Word is much more than typing your name and date on a signature line. Here are the steps to insert a wet signature on Microsoft Word so you can officially sign a digital document.
Step 1: Sign a Piece of Paper
As we mentioned, a wet signature is a physical, handwritten signature. For centuries, a wet signature was required for official documents. However, in today’s digital world, a ‘wet’ signature doesn’t need to be physically written on the document; it has the same impact on a digital document as on a physical one.
The first step to inserting a wet signature in Word is to create it. First, sign a piece of paper to capture your handwritten signature. This is what you’ll use to sign the Word document eventually.

Step 2: Scan or Take a Photo of Your Signature
Now that you have your handwritten signature scan or take a photo of it. Scanning the signature typically has the best result, as the uploaded image will likely be clearer and won’t look as out of place on the Word document. However, taking a picture on your phone is also a viable option.
However, if you capture the image of your signature, remember that you’ll need to upload the image to your computer. Therefore, capture the signature in a way that can easily be uploaded.
Step 3: Upload the Photo to Your Computer and Save it
After you capture your signature image, you’ll need to upload it to your computer and save it. How you upload the image will vary depending on how it was captured. If you scan your image, it should automatically upload to your computer for you to save (which is another benefit to scanning the image instead of taking a photo.)
If you take a photo of your signature, there are a few ways to upload the image to your computer. Taking a picture with a smartphone allows you to upload it easily: You can email yourself the photo, connect your phone to your computer and transfer it, or upload the image to the cloud and access it directly from your computer.
Step 4: Insert the Photo into MS Word
Inserting a photo into Word is extremely easy. Once your photo is saved on your computer, open up the Word document where you need to place your signature. Click the area of the document where you’d like to insert the signature image, then take the following steps:
- Select Insert in the toolbar near the top of Microsoft Word
- From the menu, select Picture
- Navigate to the photo that you saved on your computer
- Select the photo, then select Insert
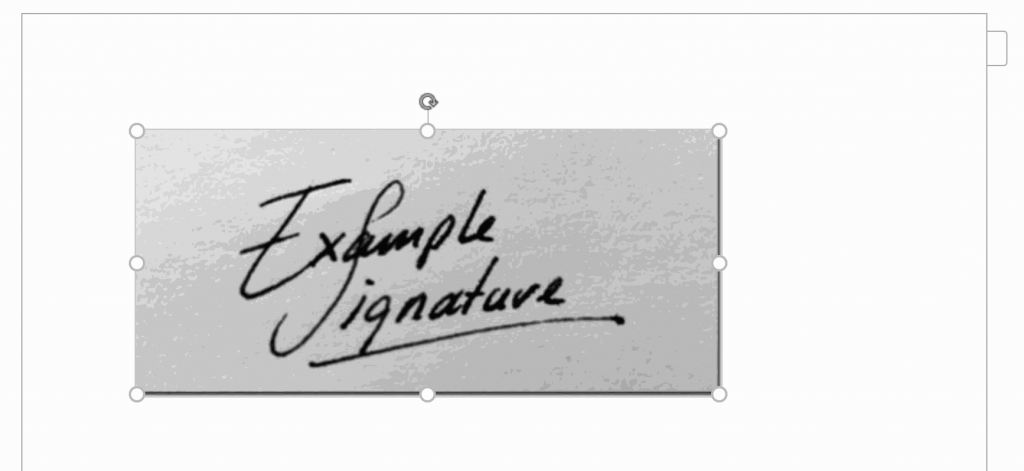
This will insert the photo directly into your Word document and act as your wet signature.

Step 5: Resize Your Signature
The signature won’t likely be the correct size, so you should resize it within the Word document. Word makes it simple to resize photos: If you select the photo, you will see selection points along the edges. Select one of the points on any of the corners of the photo and drag your mouse away from or toward the photo to make it larger or smaller.

Step 6: Save Your Document
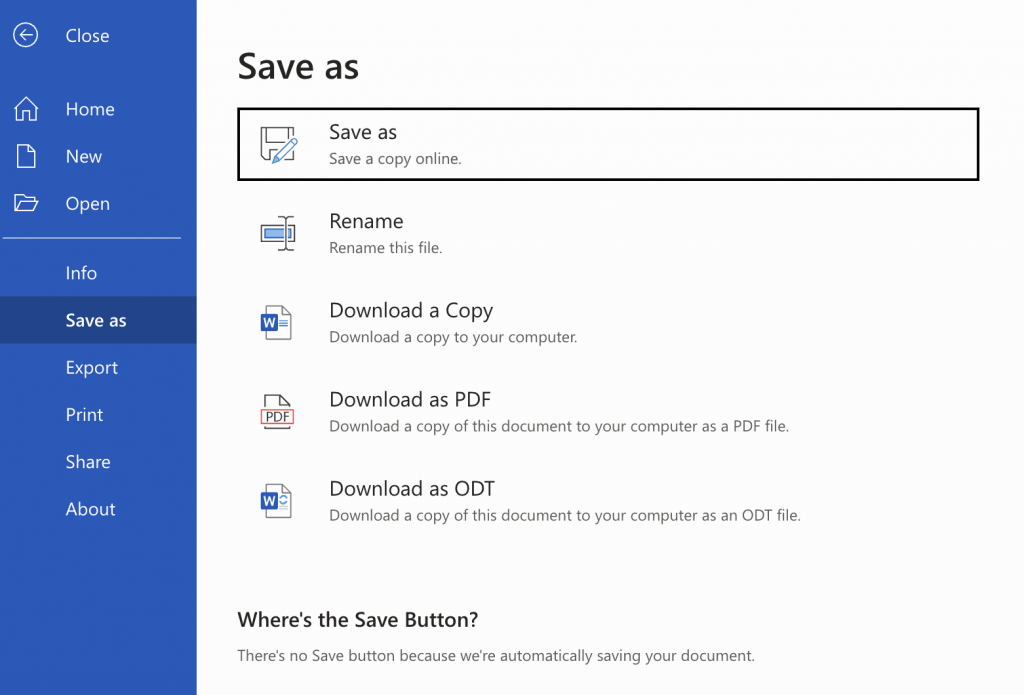
With your signature inserted in the correct place and resized to fit your document, you’ve successfully inserted your wet signature into Word. You can save the document and either print it or send it digitally. Consider saving the document as a PDF once you insert your signature for additional document security. While PDF editing isn’t impossible, a Microsoft Word document is editable by design. PDF format is intended to capture the final version of a document.
To save your document as a PDF, select File, then Save As. Before you click Save, you can change the file type from Word to PDF in the dropdown.

Limits to Wet Signatures on Word
While the above method is straightforward and effective when signing a Microsoft Word document, it may not be practical for all digital documents. The truth is Microsoft Word may not be the right place to sign important legal documents digitally; it’s just a basic, informal way to sign documents. For a more secure, official digital signature process, Signaturely has you covered.
Additionally, Word does not have live signature validation or signature timestamps, which are both important security features regarding digital signatures. Let’s take a look at how Signaturely can help you manage all of your digital signature needs.
Wet Signature Alternative: Sign The Easy Way
There are plenty of ways to obtain signatures that are quick, easy, and cost-efficient. With Signaturely, you get a streamlined, simple-to-use, and cost-effective platform that lets you manage your digital signature needs in one centralized place.
No matter how many documents or signatures you need to capture, Signaturely makes capturing signatures easier than ever—no printing or physical signing is required. Signaturely can manage signature requests, including electronic and digital signatures. It even allows for ‘wet’ signatures; use the app on your Android, iPhone, or tablet to easily hand-write your signature.
Upload a document that needs signing, send it to those who need to sign, and the platform will manage the rest. With guided signing and effective collaboration, digital signatures are a breeze.

FAQs About How to Do a Wet Signature on Word
A wet signature is a handwritten signature that someone places on a physical document. It’s referred to as a ‘wet’ signature because it’s traditionally done with wet ink. Wet signatures have been used for centuries and have long been considered the official way to sign off on a document. However, times have changed. Digital signatures are just as viable as wet signatures and can be much more cost-efficient and simpler to capture than a wet signature.
Microsoft Word doesn’t have a way to draw your signature on a document cleanly. Instead, use Signaturely’s streamlined platform to easily draw your signature onto any document.
What You Need to Remember About Wet Signatures on Word
You can insert your wet signature into virtually any Word document using the above steps. Although it’s a relatively easy process, using software like Signaturely to sign your documents (and draw your signature) allows you to create legal, formal signatures with even less effort.
