With the beginning of the digital era, many of us choose to abandon traditional tools in favor of modern, digital ones. It makes sense since we frequently communicate with people miles away from us, and traditional methods of communication aren’t sufficient. So we decided to help you find a way to replace pen and paper by signing documents electronically, even when you’re on the go, browsing your iPad. Curious? Here’s how to sign documents on iPad (fast).
How to sign documents on iPad: PDFs
Signing PDF files on your iPad shouldn’t be a complicated process. However, you might struggle to find the best app to suit your needs. Worry no more! We’re here to provide an in-depth explanation of what the process looks like in several apps and show you how you can do it seamlessly.
Signaturely
If you’re wondering how to sign a PDF file on your iPad quickly, Signaturely should be your first choice.
Apart from its free trial period, a good thing about this app is that you don’t have to check whether it’s compatible with different operating systems. As long as you have a browser and access to the internet, you’re ready to sign contracts online easily.
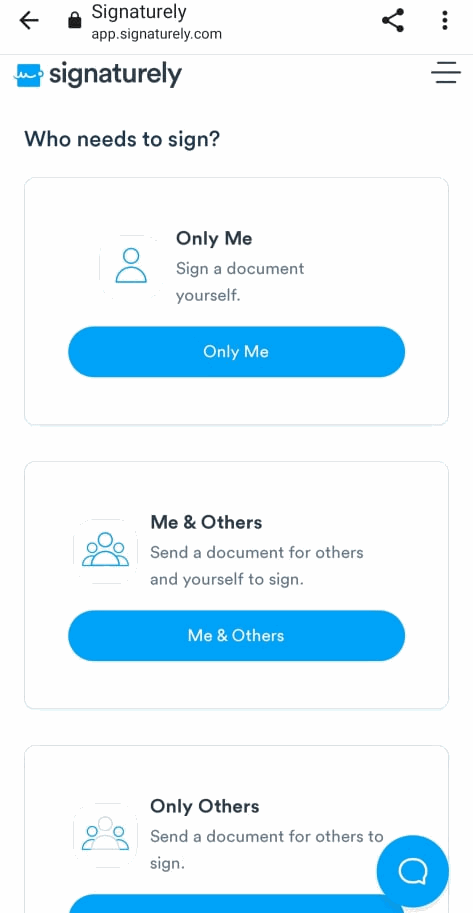
To sign PDFs on your iPad, you need to log in to Signaturely via your browser and choose between three options:
- Upload and sign a document that needs only your signature.
- Upload and sign a document that needs to be signed only by others.
- Upload and sign a document that needs to be signed by you and others.
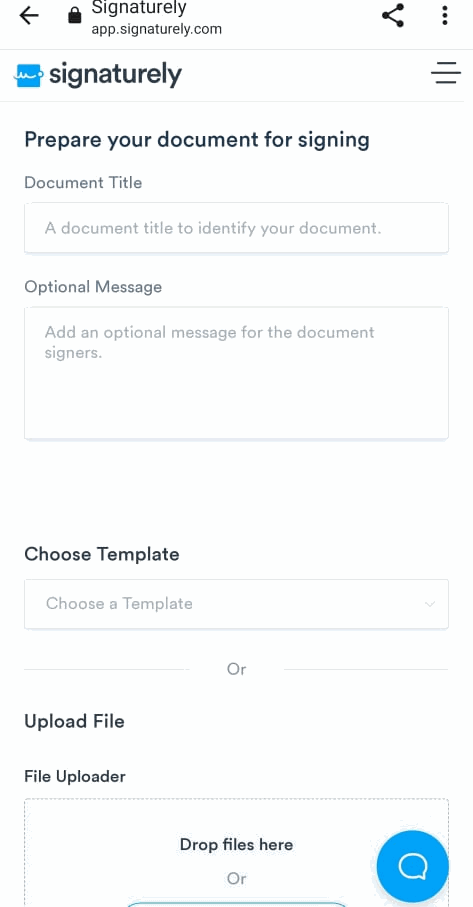
After you choose the option that fits your needs, you can name your file, insert a comment or a message if needed, and upload the file straight from your device or from Google Drive, One Drive, Box, or Dropbox.

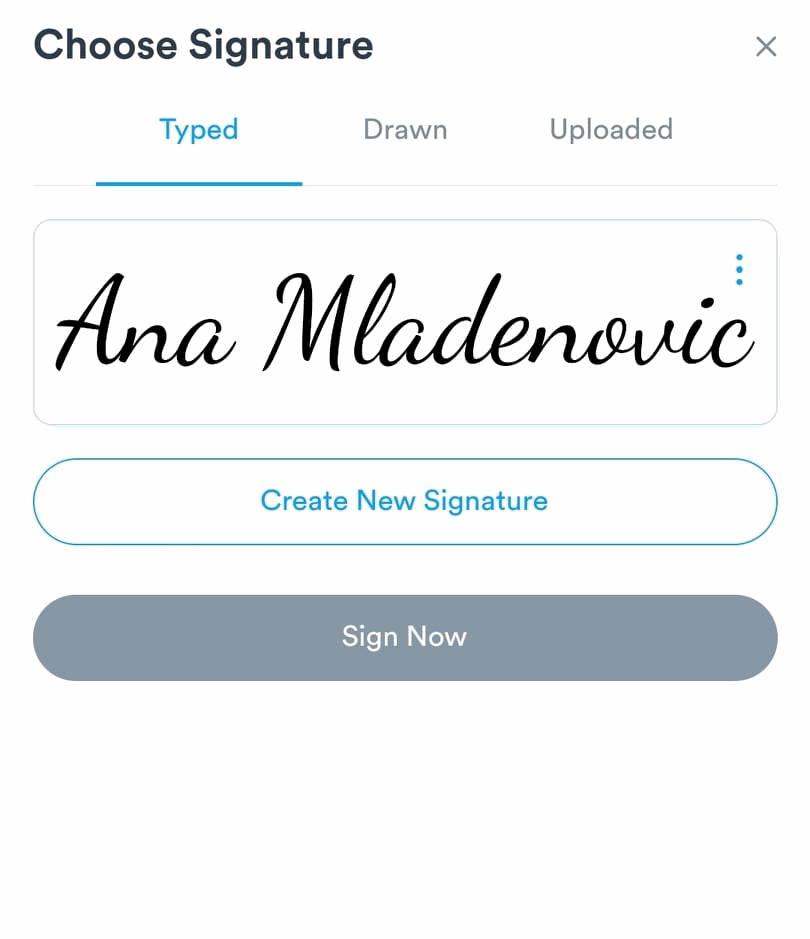
Once you upload a document, you’ll see the “Sign” option in the upper left corner. After you tap it, you can create a signature by typing and drawing it with an Apple Pencil or uploading a photo.

Next, you need to mark where you want your signature to be by tapping your finger on the screen. Click the “Sign” option again, and your signature will appear.
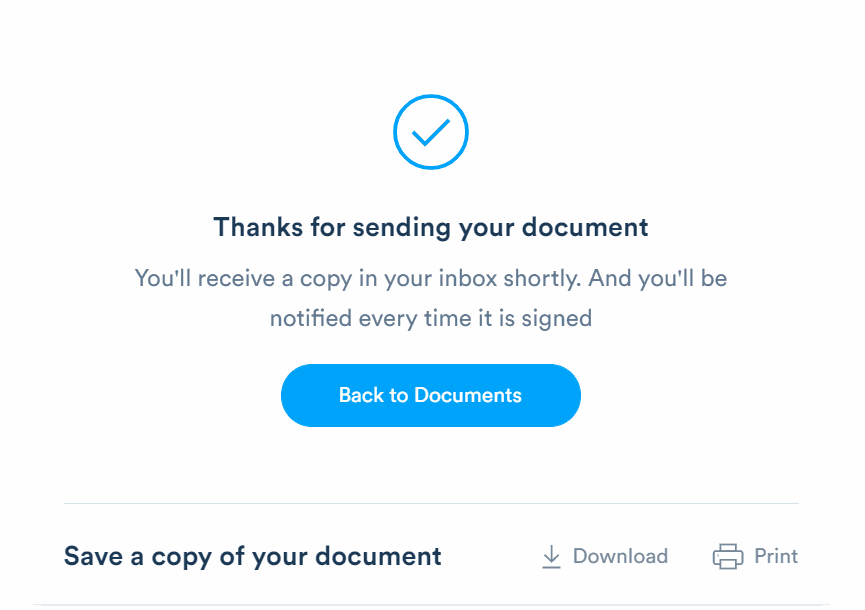
To complete the process, click “Send,” and a copy of your signed document will be sent to your inbox.
Pros:
- It has a free version
- It can run on any device
Cons:
- Having an app would be easier
Adobe Fill & Sign
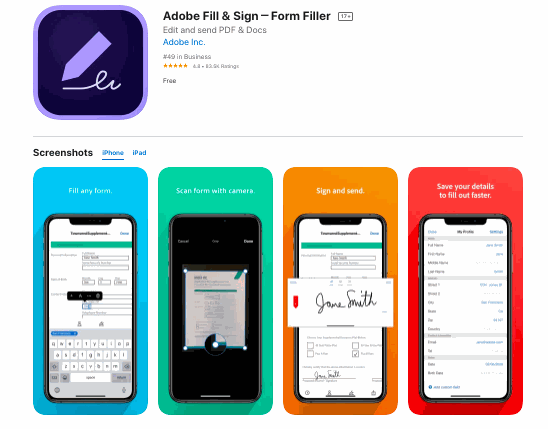
You can download the Adobe Fill & Sign app from the Play Store and on your iPad in a few easy steps to begin filling, signing, and sending any document while on the go.
This tool allows you to scan physical documents with your camera or upload forms and documents straight from your device, fill in any details, and sign them easily.
All you need to do is open a PDF document in Acrobat, tap the “Fill & Sign” button at the top right of the page, and choose to either draw, type, or place an image as your signature. After this, you must tap the “Apply” button to place your signature on the doc.
You can then send the document to others or download it.
Pros:
- Easy to use
- Ability to scan documents within the app
Cons:
- It might take up some space on your device
Mail App + Markup
One great thing about Apple products is that users can quickly digitize their signatures and apply them to documents, which decreases the need for printing.
Setting up electronic signatures on Apple devices is a simple process. You just need to open a PDF document in any app, tap the share icon, and select the “Markup” option. Once you do this, you’ll need to tap on the “+” sign and choose the “Signature” option. You’ll then see an “Add or Remove Signature” option and have to click on the plus sign to add a signature.
Once you’re done adding your new signature, click “Done.” To complete the process, you need to close the PDF, and your signature will be automatically saved.
Pros:
- Easy to create and place a signature
Cons:
- Lacks a document management feature
How to sign a document on iPad: Microsoft Word
Now that we’ve explained how to sign documents on iPad, let’s discuss how to complete this process with Word files.
Signaturely
Signing a Word document on an iPad using Signaturely is a straightforward process. Since Signaturely operates via a browser and is not dependent on any operating system, the process of signing documents is the same, regardless of the device you use.
Furthermore, signing Word documents via Signaturely isn’t different from what you’d do for PDFs. That said, you won’t have to take any extra steps or learn how to do it again. Just follow the steps we described for PDF documents.
Pros:
- Easy to use
- Compatible with a wide variety of devices
- Has a document management system
Cons:
- It doesn’t have an app
Adding a signature line with Word for iPad
Creating a signature in Word on your iPad is easy to do with just a few clicks. You’ll first have to create a signature on a piece of paper, scan it, and upload it to your iPad.
Open the Word app on your iPad, open the document you want to sign, and click the “Insert” option in the upper corner. From the menu, choose “Pictures” and upload the picture of your signature.
Click on the photo of your signature you just uploaded to reveal the format tab. You can now resize it if needed by choosing the “Crop” option.
Next, you want to type text under the picture and select it along with the image of your signature. Click on the “Insert” menu, select the “Auto text” option, and choose “New.” Name your signature in the dialogue box that will appear, and tap “OK” once you’re done.
Now, you’ve created a signature, and you can add it over and over again by placing the cursor next to the place you want your signature, going to the “Insert” menu bar, tapping “Auto text,” and then “Auto text” again, and you’re done.
Pros:
- It’s an easy process
Cons:
- If you don’t have a picture of your signature, you’ll have to print and scan a document which might be time-consuming
Mail App + Markup
Signing Word documents using your iPad’s Markup feature might be tricky. You will need to convert your Word document into PDF and then repeat the process as you’d do for PDF files.
To convert Word documents to PDFs on your iPad, you have to open the document and click “File” in the upper left corner of your screen. From the menu, choose the “Export” option, click “Export as PDF,” and click Save.
Next, repeat the process we described for PDF documents, and you’ll be done signing your documents in seconds.
Pros:
- It’s an easy, straightforward process
Cons:
- It’s time-consuming compared to other processes
FAQs About Signing Documents on Your iPad
As you have seen, signing documents on your iPad isn’t as hard as you might have thought. Once you switch to eSignatures, we doubt you’ll ever sign a paper document again. Let’s learn the answers to the most common questions about digital signatures on iPad devices.
There are many ways to sign a document on your iPad electronically. Some ways include using a dedicated eSigning software, such as Signaturely, or the “Markup” option on your Apple device. You cannot go wrong with any of these options; however, some apps offer extra features, such as signature tracking and document management, that you cannot do with the Apple Markup feature. It’s important to rethink your needs and requirements and choose the best option for you based on the volume of documentation you receive or send.
Signing PDFs on an iPad is a straightforward process. You can either use Apple’s “Markup” feature or eSignature software. The steps usually involve creating a signature, placing a signature within the document, and adding signers to the list.
There are plenty of ways to sign Word documents on your iPad, including using dedicated software such as Signaturely, adding a signature line and placing a photo of your signature, or using the “Markup” feature on your iPad.
How to sign documents on iPad: Conclusion
Have you forgotten what it looks like to use a pen and paper? You will soon! Following this guide can streamline your document signing process and business operations, saving time (and the planet) easily and efficiently.
