

Quick summary
- Scan to email converts a physical document to a digital file and sends it to an email address from a printer or device.
- The printer’s built-in scan to email feature is fast for routine documents but sends in clear text by default and gives you no delivery confirmation.
- Set it up by opening the printer’s Embedded Web Server at its IP address and entering your SMTP settings (smtp.gmail.com or smtp.office365.com, port 587, STARTTLS).
- Windows, Mac, iPhone and Android all include free built-in tools to scan a document and send it as a PDF attachment.
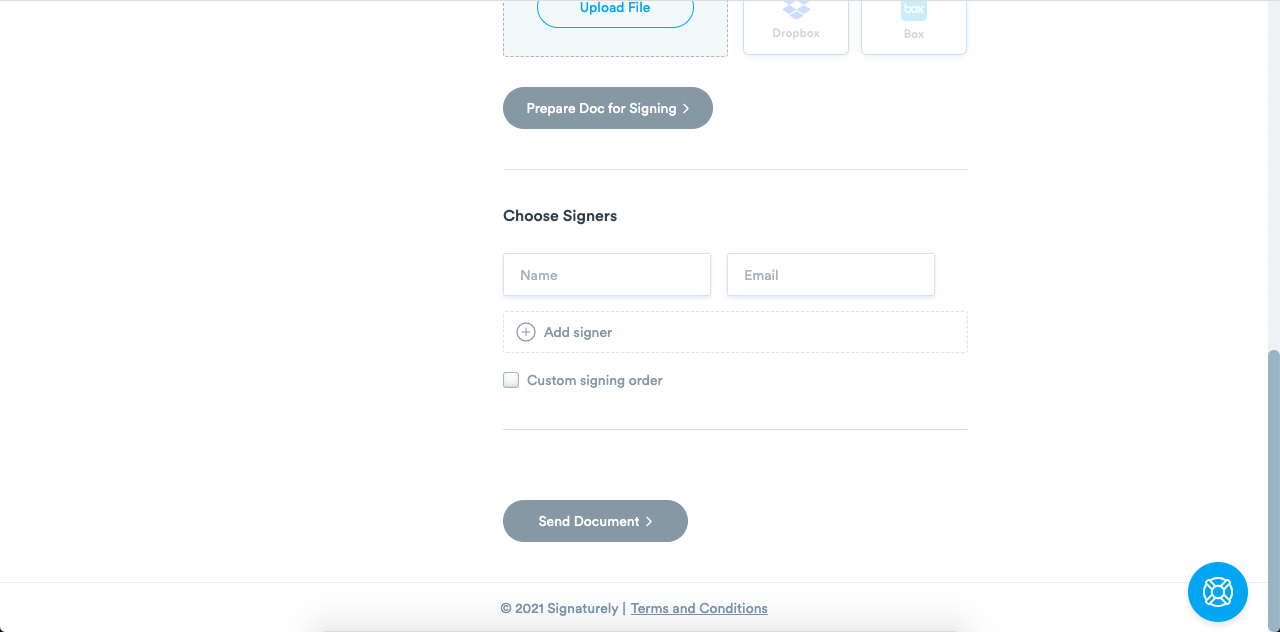
- Upload a scanned document to Signaturely, add signature fields and collect legally binding e-signatures from any device.
- Scan to email is not secure by default. Use port 587 with STARTTLS, require authentication and restrict allowed destinations to protect sensitive documents.
Scan to email should take seconds.
A wrong SMTP setting or a blocked port can stop it cold.
Most people don’t realize that a printer left on defaults sends in clear text, so every scan on a shared network is readable by anyone on it.
This guide covers every method, the correct SMTP settings for Gmail and Office 365 and how to lock it down properly.
What Is Scan to Email?
Scan to email is a printer or device feature that converts a physical document to a digital file (PDF, JPEG or TIFF) and sends it to an email address. Multifunction printers do this over SMTP with no steps on a computer. Phones and computers do the same by scanning with a camera or scanner app and attaching the file to an email.
The two approaches are pretty different in practice. With the printer’s built-in feature, you do the SMTP setup once and it’s a button press after that. Scanning from your phone or computer needs no setup, but you’re adding a few steps every single time.
Should You Use the Printer’s Scan to Email Feature?
For routine documents, the printer’s scan to email feature does the job well. PDFs, JPEGs or TIFFs go straight to a recipient’s inbox from the control panel, no computer needed. The time saving is real, especially if you’re doing this regularly. One thing: if you’re in healthcare or any regulated field, sort out TLS before you start. Most printers send in clear text out of the box.
Before you make it your main workflow, know the limits. The outgoing address is a no-reply, so whoever you send to can’t respond. There’s no delivery confirmation either, unless you set one up. And if a recipient’s inbox is full or their address has changed, you often won’t hear about it at all.
For one-off documents, fast and reliable once configured. For anything confidential or regulated, your regular email client is the better call. You get proper control over encryption, delivery receipts and who actually receives it.
How to Set Up Scan to Email on a Printer
To set up scan to email, open the Embedded Web Server (EWS) in a browser, fill in your SMTP details and save. HP, Epson, Canon, Brother: the process is the same across brands. What changes is just the email provider credentials.
- Find the printer’s IP address. Head to Settings > Network on the printer, or print a network status page. Jot down the IP.
- Open the EWS. On any computer on the same network, open a browser and type in the IP. It loads like a regular website.
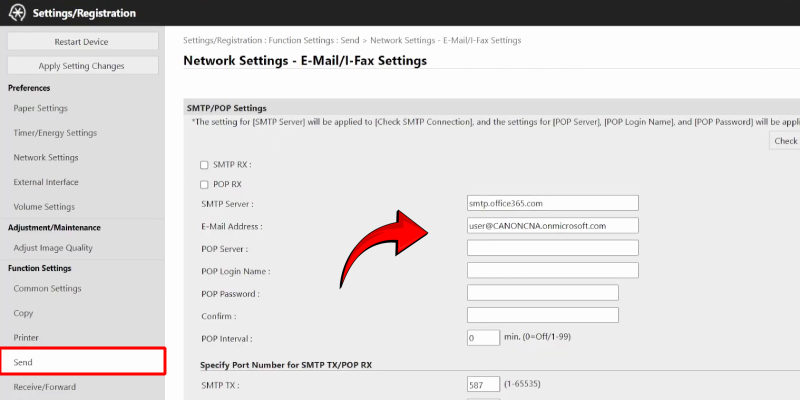
- Find the email settings. Different printers label this differently. Look for “Scan to Email,” “Email Server” or just “SMTP.”
- Enter your SMTP server details. Use the table below for the right settings per provider.
- Set the sender email address and password. Gmail users: you need an App Password here, not your regular one, if 2-Step Verification is on. Office 365 takes your normal credentials.
- Save and test. Most printers have a “Send Test Email” option. Use it to confirm the settings work before your first scan.
Worth knowing: most multifunction printers have an address book on the control panel. Store the addresses you use often and you’ll save a lot of back-and-forth. If port 587 is blocked, the printer will just time out with no useful error message. Some corporate networks lock down outbound SMTP. Your system administrator will need to open it if that’s the situation.
| Email provider | SMTP server | Port | Encryption | Notes |
|---|---|---|---|---|
| Gmail | smtp.gmail.com | 587 | STARTTLS | Requires App Password if 2-Step Verification is on |
| Outlook / Office 365 | smtp.office365.com | 587 | STARTTLS | Use your regular Microsoft 365 credentials |
Google pulled basic password auth for third-party apps in May 2025. That’s why a lot of printers suddenly stopped working with Gmail. If yours is one of them, generate an App Password: Google Account > Security > 2-Step Verification > App passwords. Swap it in and you’re back. Gmail also caps attachments at 25 MB. Anything over that becomes a Drive link.
Email providers also cap how much you can send. Gmail free accounts top out at 500 outgoing emails per day. That’s not usually a problem for a single user, but in an office where multiple people scan through one account, it can trigger a lockout. A dedicated outbound email account is the cleaner fix for high-volume setups.
Setup problems tend to repeat. These three come up most:
- Scan works but no email window appears. Go to the printer’s control panel and add the recipient’s address there manually, or add them to the address book first.
- File too large to send. Drop the DPI in scan settings. For text documents, 150 DPI is plenty and keeps the file manageable.
- Printer can’t connect to the SMTP server. Restart the printer and router. Then go back through the SMTP settings and check each field against the table.
How to Scan and Email a Document on Any Device
No multifunction printer? Every major platform has scanning covered. Once you have the file, attach it to an email, add a subject line and the recipient’s address. Done.
How to scan on Windows
Windows includes a Scan app out of the box. Search for it in the Start menu. Works with flatbed scanners and document feeders, saves as PDF or JPEG.
- Hit the Start menu, search for “Scan” and open it.
- Scanner not showing up? Check it’s powered on and connected.
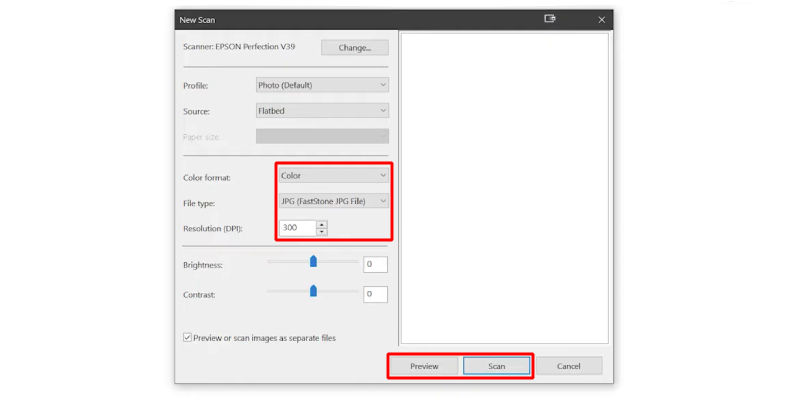
- Pick your scanner and choose a file type. PDF for documents, JPEG for photos.
- Put the document face-down on the scanner bed or feed it into the document feeder.
- Click Show More > Preview to see how it looks before you commit.
- Set color mode and resolution. 150 to 300 DPI covers most documents.
- Click Scan, then save somewhere you’ll actually find it again.
How to scan on a Mac
On a Mac, Preview handles scanning with no extra software. PDF, JPEG, PNG or TIFF, your choice depending on what the recipient needs.
- Connect your scanner and open Preview.
- Go to File > Import From Scanner and select your scanner.
- In the Import dialog, set the document type, color, size and orientation.
- Click Scan. Do this for each page.
- Save to your Desktop or somewhere you’ll find it.
Merging pages is straightforward too. After scanning, select all the thumbnails in the sidebar and go to File > Export as PDF. Preview combines them into one file.
How to scan on iPhone or iPad
The Notes app on iPhone and iPad has a scanner built right in. Most people miss it entirely. Tap the camera icon, scan your pages, and it combines them into one PDF you can share to Mail without leaving the app.
- Lay your document flat on a well-lit surface.
- Open Notes and create or open a note.
- Tap the camera icon and choose Scan Documents.
- Aim the camera. It scans automatically, or use the shutter if you’d rather do it manually.
- Repeat for more pages, then tap Save.
- Tap the scan, tap the share icon and choose Mail to send it. You can also sign documents on your iPhone before sending.
How to scan on Android
Android doesn’t ship with a dedicated scan app, but Google Drive fills that gap. PDFs go straight to Drive. From there, share to Gmail or whatever email app you use.
- Set your document on a flat surface with decent lighting.
- Open Google Drive, tap the + icon and hit Scan.
- Align the document in frame and tap the shutter.
- Crop and adjust if needed, then tap the checkmark.
- Repeat for more pages, then save the scan to Google Drive.
- Open the file, tap Share and choose your email app to send. You can also sign documents on Android before sending.
How to Scan, Email and Get a Document Signed With Signaturely
To scan, email and get a document signed with Signaturely, upload your scanned PDF, place signature fields and enter each recipient’s email address. Each signer receives an email notification with a link to review and sign. They can draw, type or upload their signature from any device without creating an account. Once all parties sign, Signaturely emails a completed, legally binding PDF to everyone.

- Create a free account at Signaturely.
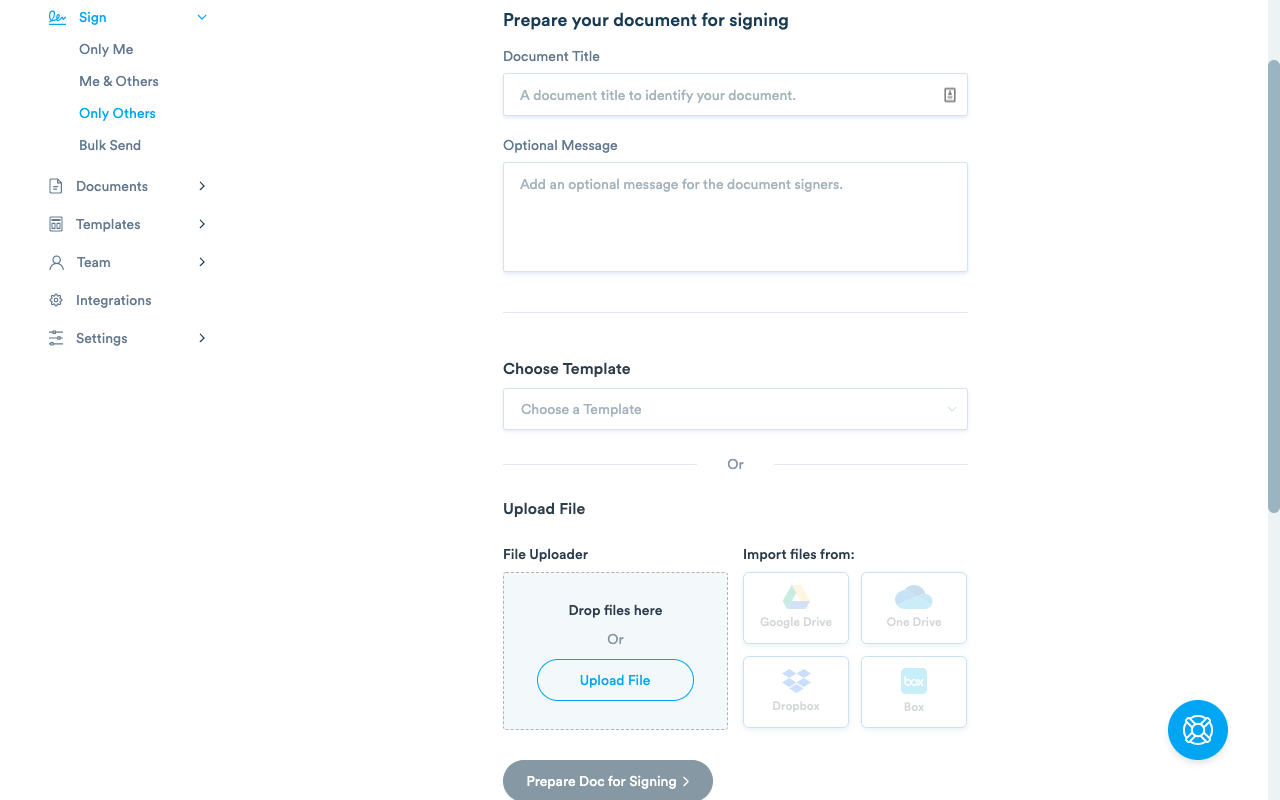
- Click New Document and upload your scanned file from your computer, Google Drive, Dropbox or OneDrive.

- Add a title and a message for the signers. Drag signature fields onto the document where signatures are needed.
- Enter each signer’s name and email address. Set a signing order if needed.

- Review and click Send Document.
Each signer gets an email with a link. They don’t need an account to open or sign. Your dashboard shows who’s signed and who’s still outstanding. One-click reminders for anyone dragging their feet. Each document builds a full audit trail as it goes: timestamps, IPs and email addresses for every event. Signaturely is free to start, with paid plans for higher volumes.
Is Scan to Email Secure?
Scan to email isn’t secure by default. Emails pass through multiple servers on the way to the recipient, and a printer sending in clear text exposes every scan to interception along that path. There’s also the authentication problem: without login requirements on the scanner, anyone on the network can trigger a scan and send it wherever they want.
Most of that risk is closeable. The things worth doing:
- Use port 587 with STARTTLS. Gmail and Office 365 both run on this. It encrypts the connection from printer to server. Port 25 sends in clear text, so steer clear.
- Require authentication. Set the printer to authenticate with a real email account, not an anonymous relay. Without it, anyone on the network can send through the printer and you’ve effectively got an open relay.
- Restrict allowed destinations. Most enterprise printers let you lock the destination address list. Limit it to approved addresses so scans cannot go to personal or unintended accounts.
- Password-protect sensitive files. Add a password to the PDF before you send it. Mac Preview and most PDF apps handle this without charging anything extra.
- Avoid public Wi-Fi. Even with TLS on the SMTP side, a public network adds real risk. Use a trusted network or switch to mobile data.
- Use cloud storage with limited access. For confidential documents, put the file on Google Drive or OneDrive and share directly with one person. You can revoke that access any time. Email attachments you can’t take back.
For genuinely sensitive material (medical records, legal contracts, financials), use your regular email client. The encryption control is better. And if the document needs a signature on top of that, Signaturely’s audit trail beats plain email by a long way.
FAQ: Scan to Email
Most scan to email questions come down to the same handful of problems: wrong SMTP credentials, the App Password requirement that caught a lot of people off guard when Gmail changed its policy, or a network that’s quietly blocking port 587. If a scan goes through but no email arrives, start with the EWS. Check that authentication is enabled and the settings match your provider exactly.
Scanning saves a digital copy to your device and stops there. Scanning to email goes a step further: the printer or app sends that file to an email address without you saving and attaching it manually. The downside is less control: the printer’s function gives you no say over the message, format or delivery confirmation compared to sending from your own email client.
Not without TLS set up. By default, printers send in clear text, so anyone on the same network can read what’s going through. Port 587 with STARTTLS fixes the connection between printer and server. For anything genuinely confidential, use your regular email client instead, or Signaturely if you need a signature trail.
Google ended basic password auth for third-party apps in May 2025. Go to Google Account > Security > 2-Step Verification > App passwords, generate one and put it in the printer’s SMTP password field. Server, port and STARTTLS all stay as they were.
Gmail’s confidential mode sets an expiry on the message and blocks forwarding, copying, printing and downloading. For a document that also needs signatures, Signaturely is the stronger tool. You get per-signer audit trails and can revoke access after the fact, which email alone can’t do.
Pick the method that fits your setup. The steps above cover everything. If a signature’s also needed, Signaturely handles the rest. No reprinting, no re-scanning.