

Thanks to ever-developing technology, we can now complete important transactions faster and easier. Signing contracts online is one of the ways we can safely streamline our business operations and handle important business transactions — even while we’re on the go. We’ll help you learn how to use digital signing software with this in-depth guide on how to sign a Word document on a Mac OS device.
These Are the Options to Sign a Word Document on a Mac
There are a few ways to sign Word documents on a Mac device. You’ll have to choose the method that makes the most sense for you. We’ll show you a few ways to streamline the document signing process on your Apple device.
Signaturely
If you’re looking for affordable and accessible eSigning software, Signaturely is the best choice.
This tool allows users to organize and streamline the document signing process by allowing them to access the app on almost any device, even on the go. Furthermore, this app stores all previous documents and tracks the signing process from the beginning to completion.
To access it and sign Microsoft Word documents on your Mac, you need to go to Signaturely’s website and log in using your credentials. If you don’t have an account, you can easily create one and sign up for the free trial period.

Once you log in to the app, you can upload a document you need to sign. However, you’ll have to choose one of three options: to upload a document that only needs to be signed by you, one that needs to be signed by others, or one that needs to be signed by you and others.

Name your document, and write an optional message in the dedicated field. You can upload a document straight from your Mac or cloud storage.
Once you’ve uploaded your Word document, click on the “Sign” box in the upper left corner to create an online signature. You can create it by typing, drawing, or uploading a photo.
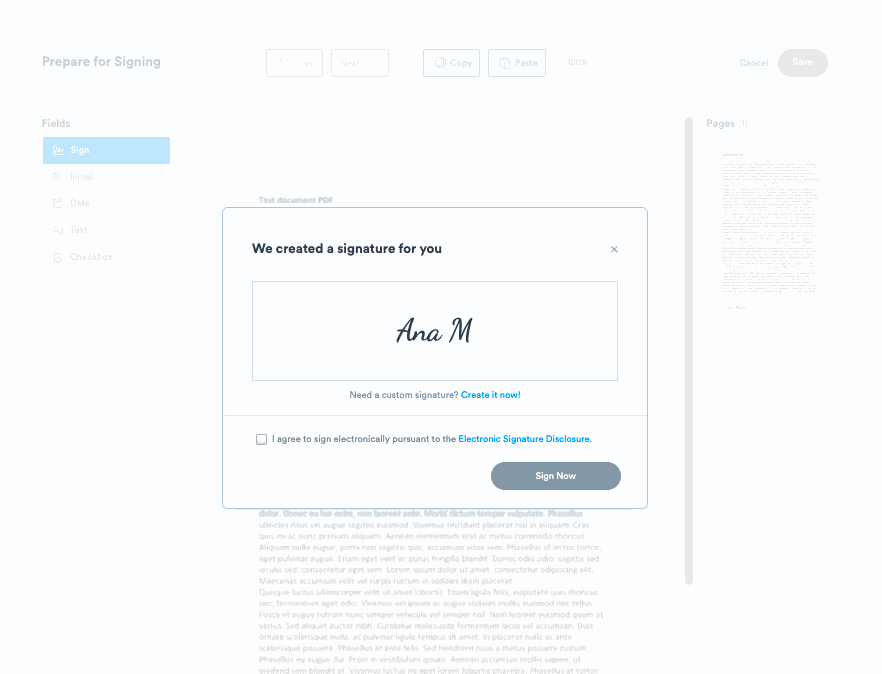
Lastly, save the signature, tap anywhere in the Word document to place it, and tap the “Sign” button.
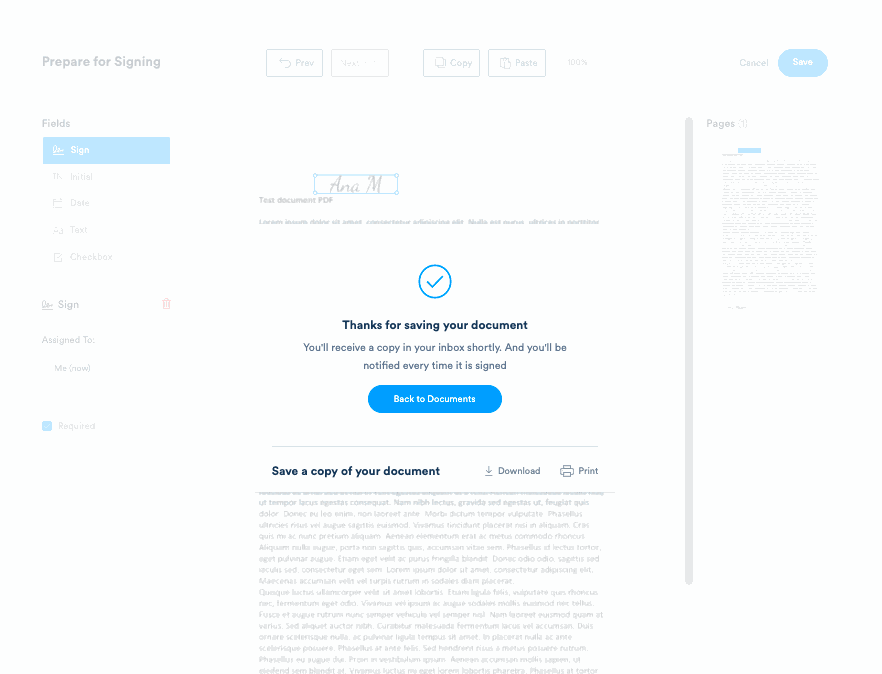
Once you’ve completed all these steps, you’ll have to tap on “Send” to complete the process.
Pros:
- Easy to use
- It has a free trial period
- Compatible with various devices
Cons:
- No available app
Upload your signature as an image and use Autotext
You can also create a signature by uploading a photo of your hand-drawn signature to Word on your Mac device.
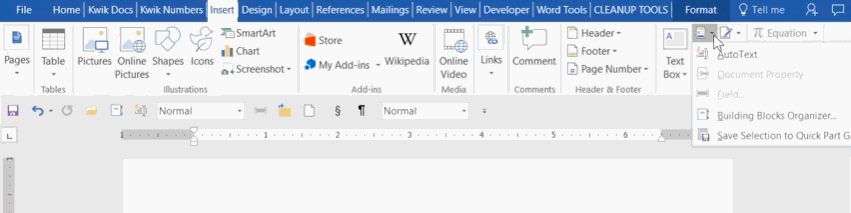
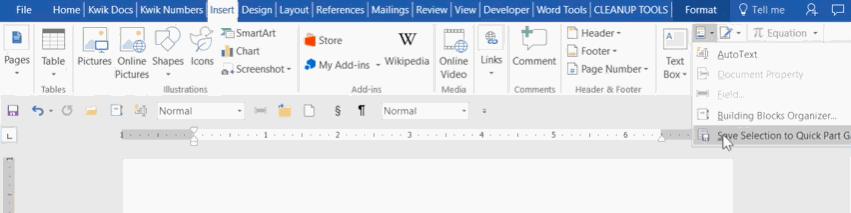
Write your signature on paper, scan it, and save it as an image. Then, click the “Insert” option, choose “Pictures,” and upload a photo of your signature. Place it in the document where your signature should be.
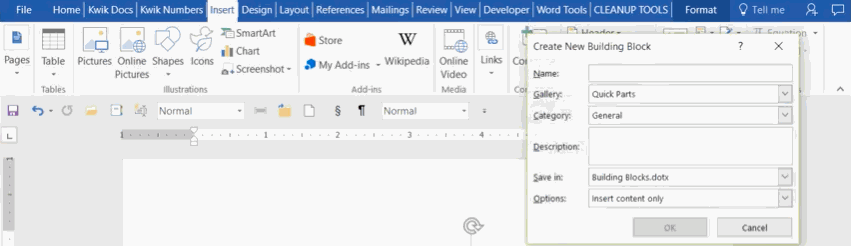
If you want to make it reusable, select the image, go to the “Insert” menu, and then to “Quick Part” and save it to the “Quick Part Gallery.” After a window pops up, you must name the picture, choose the “Auto Text” option, and save it.
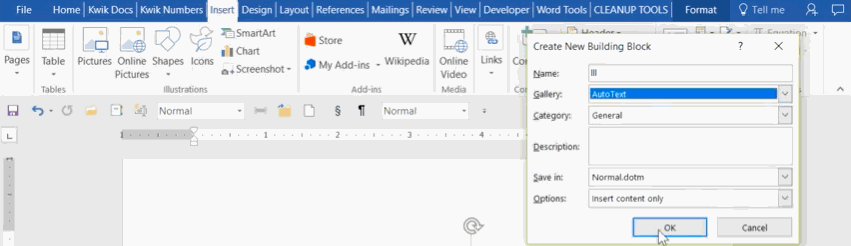
The next time you want to sign a document, you’ll have to type the name of your signature file and press the f3 button to display the signature.
Pros:
- Easy to do
Cons:
- Time-consuming process
Use Preview to sign it as a PDF
To sign a Word document as a PDF file using the Preview app on your Mac, you’ll first need to convert the Word document to a PDF by clicking the “File” option, then “Export,” and then “Export as PDF File.”
Then go to the Preview software on your Mac. Click the “Show Markup Toolbar” button, and choose the “Sign” button. Take the paper with your handwritten signature, and click the camera. Hold it up to the camera until you’ve captured it, and click “Done.”
Click the “Sign” and click on the signature to insert it into your PDF document. Place it where you need it to be, and you’re done.
Pros:
- It’s free and easy to do
Cons:
- It’s a lengthy process to complete
Summary: Everything You Need to Know About Signing Word Documents on a Mac
Signing Word documents on Mac devices isn’t that hard. It’s a straightforward process anyone can complete quickly. We’ll answer the most common questions about this topic.
There are a few ways to add a digital signature to a Word document on a Mac device. You can choose a dedicated eSigning software such as Signaturely or try one of our outlined methods, such as uploading a photo of your signature or converting a Word doc to a PDF and using the Preview app.
If you’re wondering if you can sign a Word document on a Mac device for free, wonder no more. The answer is yes! You can use several tactics to sign documents on your Mac, including accessing Signaturely’s free trial period, placing photos of your signature in the Word document, converting it to a PDF, and using the Preview option.
We believe the best way to sign a Word document on a Mac is to use a dedicated software solution like Signaturely. We strongly believe this is the most efficient way to sign Word documents on a Mac because the process is straightforward, and the software keeps all your documents in one place and helps you track the signing process. However, that doesn’t mean the other ways we showed aren’t good — they’re more time-consuming, and we like to keep things simple and efficient.
Conclusion
With these methods, you can easily sign Word documents on your Mac device in no time. You need to choose which process makes the most sense for you and how you’ll choose to manage your digitally signed documents.