An artist’s signature is the finishing touch on a piece—the culmination of hours of work. Different mediums require different considerations for placing the all-important signature on a final product. Signaturely is not only an industry leader in online signatures; we also have helpful tips and tricks for signing your fine art pieces.
Here’s how to make an artist’s signature for paintings, drawings, and more.
Why an Artist Signature is Important
Regardless of the medium, an artist’s signature is a vital conclusion to their work. All artists should sign their compositions, so if you don’t consistently sign your pieces, now is the time to start.
A signature on a piece of art, first and foremost, is a marker identifying your work as your own. Signatures can even help paintings, drawings, and other forms of fine art to increase in value over time. As an artist grows in popularity, their signature becomes more and more valuable.
Signatures also tie bodies of work together. Even disjointed, separate sets of work can have a sense of cohesion when one consistent signature is used for them all.
How to Make an Artist Signature For Different Mediums
As we mentioned, different mediums have different considerations for creating an artist’s signature—from the materials used to the signature placement. Let’s have a look at how to make an artist’s signature for different mediums.
How to Sign Paintings

Signing paintings can be tricky, as paint behaves very differently depending on the material you’re painting on, let alone the type of paint you’re using. Let’s focus on three common kinds of paint: oil, acrylic, and watercolor.
Oil paintings are typically thick and often include multiple layers of paint before the piece is complete. As a best practice, it may be easiest to simply scratch your signature into the paint. Once you have a dry base layer of paint, scratch the signature into a semi-wet top layer of paint. Use the end of a brush or a paint knife to make a clear signature.
Acrylic paintings are similar to oil paintings, but the paint dries much faster. You need to be a bit more intentional about when you sign the acrylic painting (we’ll talk about when to sign later in the article). Using paint thinner with some acrylic paint makes the medium easier to manipulate. The result is a smooth, clean signature.
Watercolor paintings dry even faster than acrylic paintings, but the thinness allows for very easy signatures. Most artists use a high-quality archival pen or a paint pen to sign their watercolor pieces.
Regardless of the medium, be sure to sign your painting before you varnish it.
Where to Sign a Painting
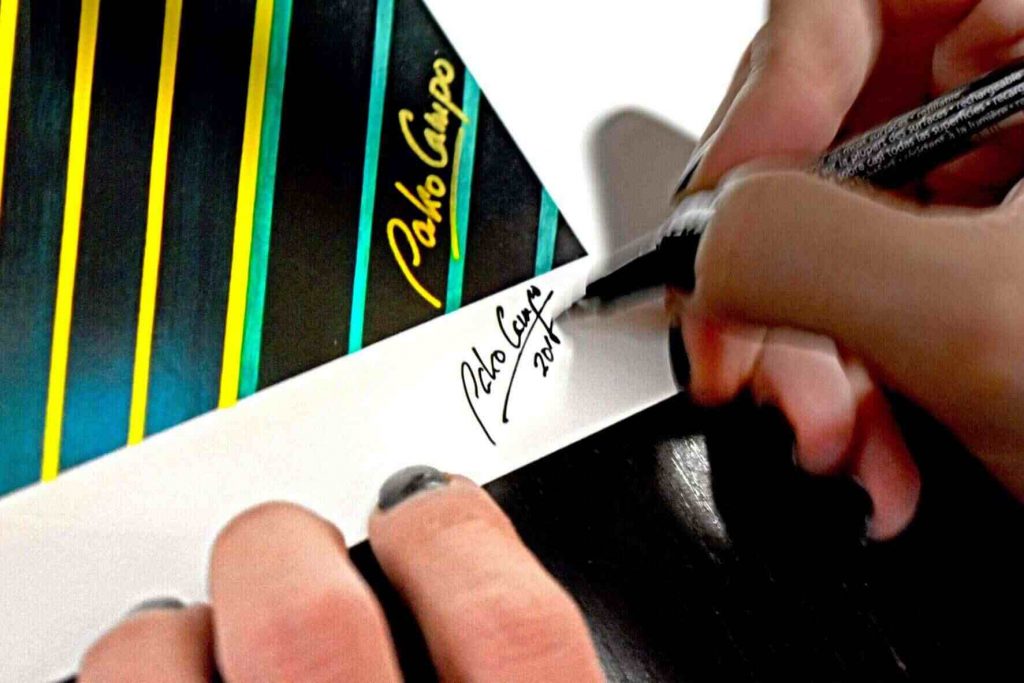
It’s important to consider where you place your signature. Traditionally, signatures are written on the bottom left of the painting’s front side. This is where most art collectors will expect a signature, although that doesn’t mean you must sign there. There are no rules of where to sign, just best practices.
Other artists prefer to hide their signatures on the back of the painting. Some might not enjoy their signature or don’t want to take away from the art, but of course, they still want to put their name on the piece. Remember that consistency is key; stick with it once you find the right placement and style.
How to Sign Drawings

As is the case with paintings, you need to consider your drawing medium when thinking through how you’ll sign the piece. Drawings can be done in traditional mediums such as graphite and artist-quality drawing pencils or more modern mediums such as ink.
There are two stylistic considerations for signing a drawing. While signing a painting inherently contrasts the signature vs. the piece of art, it’s easy for a signature to get lost in a drawing. Whether you’d like it to stand out or be hidden, it’s important to consider what you use to sign the piece.
For example, signing a graphite drawing with graphite may not make the signature stand out. Signing with ink or something as drastic as making your signature white will make a bold artist statement and ensure that viewers see your signature. What you intend to say with your signature will help you decide what tool you should use to sign your work.
Where to Sign a Drawing
Signatures on drawings are similar to signatures on paintings; traditionally, signatures are placed on the front of the piece on the bottom left. Again, thinking about the signature’s intent can help you decide. Want to claim your work boldly? The front of the drawing is the right place for your signature.
How to Sign Prints

Prints are duplicates of the same piece of art, but it’s important to differentiate them from one another. Without a clear way to differentiate them, they may not be as valuable – and without a unique marker for limited editions or limited runs, someone may fraudulently duplicate your art. First, ensure your print is on high-quality material. The better the material, the easier it will be to sign.
Second, choose the right medium for your signature. Size, placement, and style are all important. Consider using ink on a high-gloss print. Matte finishes can be signed with a pencil and sealed with a light varnish spray. While consistency is important, the subtle differences in your signatures can help make each print unique—a bit of variation adds to the signature’s authenticity.
Finally, consider numbering your limited-edition prints. For example, if there are only 10 prints available, number them with 1 through 10. This shows the rarity of the piece and can make it more valuable. Knowing the prints are limited-edition can motivate collectors to pay more for your work.
Where to Sign a Print
Where you sign a print can also make the piece unique. Most prints are signed near the edge, but buyers may request a signature elsewhere.
How to Sign Digital Art
The popularity of digital art is on the rise, so it’s important to have a simple, effective way to sign your digital artwork. While the method of signing digital art may differ, all the same rules apply; the placement and style of the signature are important. Signaturely can help you create the right signature for all of your digital art.
Whether it’s a stagnant, consistent digital signature you simply place on your work or a hand-drawn signature, signatures on digital art are just as important as those placed on traditional works. Here are some tips on how you can digitally sign a drawing or painting on your iPad.
Where to Sign Digital Art
Digital signatures are found on the ‘front’ of the piece, as there is no back to sign. While digital art is often tied to an online profile or is presented on a website where clear credit is given to the artist, a digital signature can help give a piece that finishing touch.
Tips for Making an Artist Signature

Now that you’ve got some best practices for signing various art pieces, let’s take a look at tips on creating an artist signature.
1. Make Sure It’s Legible
First and foremost, your signature should be legible. Unless you’re already a world-famous artist, chances are people don’t yet know your name. A legible signature not only claims the art as your own but also gets your name out there.
The size of your signature is also an important factor—too small, and the signature can’t be read. Too large, and it distracts from the art. Finding the right size for your art may take a bit of practice. To help you get the right proportions for your signature, use tracing paper to test out a few sizes before committing.
2. Using Your Full Name vs. Initials
Again, a signature is all about name recognition. It’s best to use your full name instead of your initials, especially if you plan on selling your paintings and building a brand for yourself.
Your full name allows potential buyers and collectors to connect with you online easily, so don’t leave potential customers guessing by only including your initials.
3. Sign At the Right Time
As a best practice, sign your work as soon as it’s complete. If you’re signing a painting, be sure to sign before the painting is varnished. Varnish is a clear coat that protects paintings from dust and other external factors. It also makes colors more intense and creates a consistent look for the painting. Once varnish is applied it’s difficult to sign the painting in a presentable way.
We’ve already mentioned the benefit of signing an oil painting early as the top layer of paint is drying; it also makes sense to sign a drawing shortly after it’s complete. Waiting may make the signature look out of place as the graphite or ink may fade over time.
4. Keep Framing in Mind
Placement is not only an important visual consideration when signing your piece. It’s also a matter of practicality if the art is going to be framed. It’s important not to sign too low or too close to any edges.
Make sure you account for the space the frame will take up on the piece before you sign. If you don’t yet have a frame, it may be worth waiting to sign your piece until you know how much space will be taken along the edges.
5. Use a Straight Edge
A straight edge is a simple, effective tool that allows you to line your signature up with the bottom edge of the art. It also helps create consistency across your signatures. Signatures don’t have to be perfectly straight, but a straight edge gives your signature a professional look.
6. Create a Digital Signature that Can Be Reused
All of the above points can be adapted into a digital signature. Creating a digital signature that can be reused ensures consistency and makes your signature easily recognizable to buyers.
Signaturely can help you create the ideal digital signature for your art that can be used time and time again. The simple, easy-to-use platform lets you quickly generate a signature in various styles. The signature is verified and can be used on all of your digital art. When creating a signature on Signaturely, the signature is unique to you. With timestamps and verified signature ownership, using Signaturely ensures signatures are legitimate.
Artist Signature FAQs

With Signaturely, you can quickly and easily create an electronic signature for digital art. With various plans to choose from, Signaturely can be your partner on your digital art journey by helping you create a consistent, professional, recognizable signature to use across all of your digital art pieces.
There are many applications to create digital signatures, but none are specifically tailored to artist signatures. Artist signatures should be unique to the artist and consistent with the artist’s brand. Signaturely can assist in creating a recognizable and uniform signature across your works of art.
What to Remember About How to Make an Artist Signature
However, you create your artist signature, remember: consistency is key. Whether you’re signing an oil painting or creating a digital signature, the placement and style of your signature should not vary.
Check out Signaturely’s industry-leading signature features today, and let them be your trusted partner for your artistic endeavors!
